Difference between revisions of "The Players' Guide to the Cities/User Interface"
m (→Enhancements Window: trim) |
m (→Email Window: trim) |
||
| Line 34: | Line 34: | ||
==[[{{NAMESPACE}}:{{PAGENAME}}/Email Window|Email Window]]== | ==[[{{NAMESPACE}}:{{PAGENAME}}/Email Window|Email Window]]== | ||
| − | |||
| − | |||
| − | |||
| − | |||
| − | |||
| − | |||
| − | |||
| − | |||
| − | |||
| − | |||
| − | |||
| − | |||
| − | |||
| − | |||
| − | |||
| − | |||
| − | |||
| − | |||
| − | |||
| − | |||
| − | |||
| − | |||
| − | |||
| − | |||
| − | |||
| − | |||
| − | |||
| − | |||
| − | |||
| − | |||
| − | |||
| − | |||
| − | |||
| − | |||
==[[{{NAMESPACE}}:{{PAGENAME}}/Tray Window|Tray Window]]== | ==[[{{NAMESPACE}}:{{PAGENAME}}/Tray Window|Tray Window]]== | ||
Revision as of 23:07, 8 August 2007
Contents
- 1 Windows
- 1.1 Status Window
- 1.2 Chat Window
- 1.3 Team Window
- 1.4 Search Window
- 1.5 Pets Window
- 1.6 Friends Window
- 1.7 Super Group Window
- 1.8 Email Window
- 1.9 Tray Window
- 1.10 Powers Window
- 1.11 Inspirations Window
- 1.12 Enhancements Window
- 1.13 Salvage Window
- 1.14 Recipes Window
- 1.15 Target Window
- 1.16 Action Window
- 1.17 Nav Window
- 1.18 Map Window
- 1.19 Contact Window
- 1.20 Mission Window
- 1.21 Clues Window
- 1.22 Badge Window
- 1.23 Menu Window
- 1.24 Help Window
- 1.25 Costume Window
- 1.26 I.D. Screen
- 1.27 Info Window
- 1.28 Support Window
- 1.29 Options Window
- 1.30 Quit Window
- 2 Targeting Reticle
Windows
There are several windows that you may display in your user interface that will aid in navigating through the game, surviving your encounters, and communicating with other players.
Several of these windows display general information and are able to spawn other windows with more detailed information. This may be done by clicking on the name of the child window you wish to open. You may then close the child window by clicking on the name of the window again. You may also close these windows by clicking on the small red 'X' bubble in either the lower or upper right hand corner of the window.
Often, these child windows are attached to their parent by default and will move with the parent window. When anchored to parent windows, opening a second child window from the same parent will close the first child window.
Some child windows can be released from their parents and allowed to float. Floating windows may be dragged to new locations and can often be enlarged to display more detail or shrunk to be placed off to the side where they will serve as information, but not interfere with your interaction with the world. In addition, a window that is floating can be opened and closed independently of the child windows belonging to the same parent window.
For example, if the Map Window is anchored to the Nav Window, moving one will move the other. If you have the Map Window open and decide to open the Badges Window (which, in this example we will assume is also anchored), the Map Window will close and the Badges Window will open. However, if the Map Window is floating and you decide to open the Badges Window, doing so will not close the Map Window. Similarly, if the Map Window is set to float and the Badges Window is currently open, opening the Map Window will not close the Badges Window.
In order to set a child window to float, click on the bubble in the upper or lower left corner of the child. If the bubble is filled, the window will be anchored. If the bubble is empty, the window is floating.
Any window that may be resized can be manipulated by clicking on the outer borders of the window and dragging them to make the window the right size.
Clicking in the tab on the upper or lower border of any floating window will allow you to drag the window around the screen to reposition it.
In a few cases, windows may have sections within them that may be resized by clicking the borders between sections and dragging them to reallocate space. Columns of information in the Super Group Window and the divider between the upper and lower chat windows in the Chat Window are just two examples of this.
Status Window
Chat Window
Team Window
Search Window
Pets Window
Friends Window
Super Group Window
Email Window
Tray Window
The Tray Window may be opened by clicking "Tray" in the outer border of the Status Window or selecting "Tray" from the Menu window.
The following additional windows may be accessed from the Tray Window:
- Powers
- Inspirations
- Enhancements
- Salvage
- Recipes
In the Tray Window, you will see between one and three lines of ten numbered circles. These are referred to as Power Trays.
You have a total of nine Power Trays, but are only able to view up to three at a time. Each Power Tray is labeled 1-9 and these numbers are displayed on the left side of each Power Tray. You can cycle through these trays by clicking on the right or left arrows on either side of the tray numbers.
If you wish to change the number of trays you currently have displayed, you may do so by clicking on the arrow at the top of the Tray Window. Clicking this arrow when you have only one Power Tray displayed will cause a second Power Tray to appear. Clicking this arrow when you have two Power Trays displayed will cause a third Power Tray to appear. Finally, clicking this arrow when you have three Power Trays displayed will cause two of the trays to disappear, leaving only one. By default, you may also cycle through the number of visible Power Trays by pressing the right 'Alt' key on your keyboard.
You can drag Power icons from your Power Window to your Power Tray, and arrange them in whatever order you prefer. In order to remove an icon from your Power Tray, right click on the icon and select "Remove from Tray." To move an icon from one slot to another, click and drag the icon to its new position. If another icon was originally in that position, the two will swap. (You may enable/disable the "Lock Powers in Tray" option in the General Miscellaneous Options to either prevent accidentally dragging Power icons or allow the icons to be dragged.)
In addition, when you create a macro, if there is an empty slot available in one of your Power Trays, an icon with the macro name will appear. You may then activate the macro at any time by clicking on it.
There are two main types of Powers you will be able to add to the Power Trays:
- Click Powers - Click Powers execute once per activation. You activate a Click Power with the mouse by clicking on it.
- Toggle Powers - Once activated, Toggle Powers will continuously execute until you run out of Endurance, deactivate the Power, become stunned or held, fall asleep, or are defeated. Inactive Toggle Powers may be activated by clicking on them. To Deactivate a Toggle Power, click on it again.
Players will often use the following terms when discussing Powers in the game.
- Activation, Animation or Execution Time - When you execute a Click Power, a white streak will circle the Power's icon as it executes. The period of time during which this streak appears is referred to as the Click Power's Activation Time. When you activate a Toggle Power, a white streak will circle very quickly around the Power's icon. Once the Power is active, the streak will slow down. The period of time during which the streak moves quickly is referred to as the Toggle Power's Activation Time.
- Recharge Time - After a Click Power executes or a Toggle Power is deactivated, you will usually see the Power's icon shrink and become shadowed. The icon will then begin to grow until it reaches its normal size again and resumes its original coloration. The amount of time the icon takes to reach its normal size again is referred to as the Power's Recharge Time.
- Queuing Powers - Most Click or Toggle Powers can be queued. Trying to reactivate a Power before it has finished recharging will queue the Power. Trying to activate a Power that can only be executed under the right conditions will frequently queue a Power. Queued Powers will activate as soon as the Power is recharged and all special conditions are right. For example, targeting an enemy and attempting to activate a charged melee attack from half way across a room will queue the melee attack. The attack will then automatically execute if you close into melee range with the target. Queued Toggle Powers will automatically activate when they finish recharging. Queued Power icons will be marked by a red border in your Power Tray. Only one Power may be queued at a time.
- Targeted Reticle Powers - Some Powers require not only the activation of the Power, but the selection of the destination. The cursor turns in to a reticle of shrinking, concentric rings allowing the player to place the target of the Power. The reticle is white if the target is a valid location, and red if the target is invalid. Interactions with the environment using the mouse are impossible while the reticle is in use, however other Powers may be activated, reverting the cursor to its default state. Examples of Targeted Reticle Powers include Teleport, Recall Friend, Pet summoning Powers or Area of Effect Powers. These Powers get a solid white border in your Power Tray, indicating that the reticle requires placement to return default use of the mouse.
- Auto-Executing Powers - You may set one Click Power to Auto-Execute. This Power will execute any time it is recharged and all special conditions (if there are any) are met. Auto-Executing Powers receive a green border in the Power Tray. Setting a Brawl to Auto-Execute, for instance, will cause Brawl to execute whenever you are in melee with a target and the Power is recharged. Setting a Power that does not require special conditions to execute (i.e. Hasten or Healing Aura) will cause the Power to execute every time it recharges. Some Powers, such as Powers that may be interrupted (i.e. Blaster sniper attacks) or Powers that require targeting a defeat team member (i.e. most resurrection Powers, Vengeance, and Fallout) can not be set to Auto-Execute. In order to set a Power to Auto-Execute, hold down the 'Ctrl' key and click the icon for the Power you wish to set to Auto-Execute. Holding 'Ctrl' and clicking again will deactivate the Auto-Executing Power. Pressing the 'Z' key (by default) will clear all Queued Powers and disable the Auto-Executing of a Power.
By default, the number keys across the top of your keyboard may be used to activate Powers in lieu of the mouse. Each slot in each Power Tray is numbered 1, 2, 3. . . 8, 9, 0, corresponding to the numeric keys at the top of your keyboard. Powers in slot 6, for instance, can be activated using the '6' key. Each time you use a keystroke corresponding to a Power icon in your Power Tray, the keystroke will behave the same as a single click from the mouse. You may access the Powers in each of the visible Power Trays as follows:
- Bottom or First Tray - Powers in this tray can be activated by pressing only the numeric keys.
- Middle or Second Tray - Powers in this tray can be activated by holding down the left 'Alt' key and pressing the numeric keys.
- Top or Third Tray - Powers in this tray can be activated by holding down the 'Ctrl' key and pressing the numeric keys.
Powers Window
The Powers Window may be opened by clicking on "Powers" on the outer edge of the Tray Window or selecting "Powers" from the Menu Window.
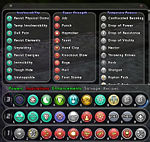
In the Powers Window, you will see all of the Powers in selected Power Groups. Your Primary Power Set will be on the left and your Secondary Power Set will be in the middle. On the right side of the window will be several sets of Powers, including Temporary Powers, Inherent Powers, any Power Pools from which you have selected Powers, and Ancillary or Patron Power Sets.
In each Power Set, any Powers you have not gained through training will be shaded and Powers you have taken will appear brighter. Any Power you have gained through training will allow you to right click to display more information. Powers that are not Automatic Powers (always active) may be dragged from the Powers Window and placed in the Power Trays in the Tray Window.
Inspirations Window
The Inspirations Window may be opened either by clicking "Inspirations" at the top of the Tray Window or selecting "Inspirations" from the Menu Window.
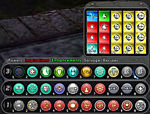
In this window, you can view and manage any Inspirations you have collected. Each square or "slot" in the grid represents room to carry one Inspiration. You begin with three slots in your Inspiration Window and gradually gain extra slots as your level increases.
| Level Range |
Inspiration Slots |
| 1 | 3 |
| 2 | 4 |
| 3 - 9 | 8 |
| 10 - 24 | 10 |
| 25 - 39 | 15 |
| 40+ | 20 |
Clicking on the arrow at the top of the window will toggle between displaying all of the Inspirations in the window and showing only the bottom row of Inspirations.
You are able to organize the Inspirations in your Inspiration Window however you wish by clicking and dragging them around. Dragging one Inspiration on top of another will trade their positions in the window. At any time, if there is an empty slot under another Inspiration, that Inspiration (and any above it) will slide down one slot in the window.
An Inspiration may be used by clicking on it once. Inspirations may be given to other players near you by dragging them from your Inspiration Window either onto the player you wish to give the Inspiration to or by dragging the Inspiration to the other character's name in your Team Window. You may also right click on an inspiration and select the name of a team mate to whom you wish to give the Inspiration.
Each column of Inspiration slots is labled F1, F2, etc. By default, each of the first five function keys on your keyboard allow you to use whatever Inspiration is at the bottom of the corresponding column. For example, if you have an Enrage Inspiration at the bottom of your F2 column and press F2, you will consume that Enrage.
When your Inspiration Window is completely filled, the word "Inspiration" will appear in red in the Tray Window. You may make room for more Inspirations either by giving some away, using some, or by right clicking on an Inspiration and selecting "Delete Inspiration."
Enhancements Window
Salvage Window
The Salvage Window may be opened by clicking on "Salvage" on the outer edge of the Tray Window.
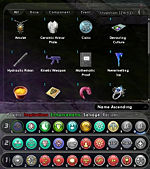
In this window you may view any Salvage that you have collected. At the top of the window will be several tabs:
- All - This tab will allow you to view all of the Salvage you have collected.
- Base - This tab will display only the Base Salvage you have collected. Base Salvage is used to create Components.
- Component - This tab will display only the Components that you have collected. Components are crafted from Base Salvage. Components are then used to craft certain Base Items.
- Event - This tab will display only the Event Salvage that you have collected. Event Salvage is related to special events in the game and may be collected only during those events. This salvage could be used for many different purposes. For example, salvage from the 2006 Halloween event may be used to gain an additional Costume Slot.
- Invention - This tab will display only the Invention Salvage that you have collected. Invention salvage is used in conjunction with Invention Recipes to create Invention Origin Enhancements and some Costume Pieces and Temporary Powers. The Invention Salvage tab will also tell you how many pieces of Invention Salvage you are currently carrying out of the maximum number of items you are capable of carrying.
- Special - This tab will display only the Special Salvage you have collected. Special Salvage items have their own specific purpose, but are not specifically tied to any special event in the game.
There are limits to how much salvage of each type you can carry. The limit to the number of Invention Salvage items you can carry at any time are based on your level with certain Badges granting you extra capacity. The following table outlines the base levels of Invention Salvage that you can carry at each level.
| Level Range |
Capacity |
| 1 | 3 |
| 2 | 4 |
| 3 | 8 |
| 4 | 15 |
| 5 - 35 | 30 |
| 36 | 32 |
| 37 | 34 |
| 38 | 36 |
| 39 | 38 |
| 40 - 44 | 40 |
| 45+ | 50 |
When the number of Invention Salvage items you are carrying matches your maximum capacity, you will be unable to collect any more Invention Salvage without first deleting, giving away, or selling some of the Invention Salvage you are currently carrying. "Salvage" in your Tray Window will turn red to indicate that you have reached your limit on Invention Salvage items.
For all other types of Salvage, there are maximum amounts that may be carried, but they are per item and are independent of your level.
| Salvage Type |
Limit |
| Base | 20 of each item |
| Component | 99 of each item |
| Event | 99? of each item |
| Special | (900 and counting) of each item |
Right clicking on any items in your Salvage Window will give you such options as allowing you to view more information on the item, delete an individual item, or delete an entire stack of items.
Items may be sorted in the window by selecting from the dropdown menu in the lower right corner of the window. You may sort items by name (alphabetical or reverse alphabetical order), the amount of each item in your possession (high to low or low to high), or rarity (more to less common or less to more common).
Recipes Window
The Recipies Window may be opened by clicking on "Recipes" on the outer edge of the Tray Window. This window also opens when you interact with Invention Worktables.
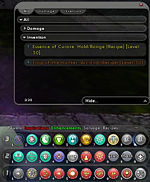
In this window, you will be able to view your current inventory of Invention Recipes. Across the top of the window are tabs that will allow you to filter the Recipes by type. The tabs available will depend on which Recipes you currently have in your inventory. For instance, if you have any Accuracy Enhancement Recipes, there will be a tab labeled "Accuracy" at the top of the window. Clicking on the "Accuracy" tab will display a list of only your Accuracy Enhancement Recipes. On the other hand, if you do not have any Accuracy Enhancement Recipes, there will be no "Accuracy" tab at the top of the window. All Invention Enhancement Set Recipes will be listed under "Invention."
In the "All" tab, you will see a list of the categories in which there are Recipes you possess. You can expand or collapse each category to see the names of all of the Recipes you have in that category.
In each inventory tab, the dropdown menu in the lower right corner of the window will allow you to further filter your view by hiding/displaying recipes you do not own and hiding/showing recipes for which you are missing ingredients.
In addition to any Recipes you currently possess, whenever you interact with an Invention Worktable, all of the Common Recipes that you are able to purchase from the table will be displayed.
On the left of each Recipe's name will be a number indicating how many copies of that Recipe you have in your inventory. Each Recipe's name is color coded according to the rarity of the Recipe. Common Recipes appear in white, uncommon Recipes appear in yellow, and rare Recipes appear in orange. The names of any Recipes for which you have not collected all of the neccessary ingredients will be slightly shaded. When you have all of the requisite Salvage and Influence/Infamy to craft a Recipe, the name of the Recipe will be brightly lit.
To view information on a particular Recipe in more detail, click on the name of the Recipe. This will expand the Recipe info to give you all of the information about the item or Power that Recipe is used to create. You will be able to see what Salvage is needed and how much Influence/Infamy you will need to craft the Recipe. In this list of ingredients, any needed items that you do not currently possess will be displayed in red.
In the bottom left corner of the window you will find an indication of how may recipes you currently have in your inventory out of your total capacity. Your base capacity is determined by your level.
| Level Range |
Capacity |
| 1 - 5 | 1 |
| 6 - 9 | 4 |
| 10 | 8 |
| 11 - 15 | 10 |
| 16 - 19 | 11 |
| 20 - 25 | 12 |
| 26 - 34 | 13 |
| 35 - 40 | 14 |
| 41 | 16 |
| 42 | 18 |
| 43+ | 20 |
When you have reached the limit of the number of Recipes you can carry, the word "Recipes" on the outer edge of your Tray Window will turn red. You may right click on any recipe in your inventory and select "Delete Recipe?" to delete make more room. You may also give Recipes to other characters by dragging the recipe from the window on top of the character, dragging the recipe from the window on top of a character's name in your Team Window, or right clicking on the recipe and selecting "Give to."
While interacting with an Invention Worktable, if you are viewing the detailed information for a Recipe and you have all of the ingredients needed to craft the Recipe, you will be able to click on the "Create?" button to craft the Recipe. When you craft a Recipe, one copy of the Recipe will be removed from your inventory, as will the Salvage and Influcence/Infamy you needed to craft the Recipe.
Target Window
The Target Window may be opened either by clicking on "Target" in the Status Window or selecting "Target" from the Menu Window.
The Target Window will display information about any object in the game that can be targeted.
If you currently have no target selected, this window will simply display, "No Target."
Hostile Targets
When you select a hostile target, you will see your target's name at the top of this window. Depending on the relative challenge your target presents, you may see a set of triangles pointing either up or down directly below the name. A triangle pointing up indicates that your target is more powerful than you. A triangle pointing down indicates taht your target is less powerful than you. The more triangles you see, greater the difference in power. If no triangles are present, your target is either equal to you, significantly greater than you, or significantly lower than you in power level. The color of a hostile target's name when displayed is another indicator of its power level. These two indicators will allow you to quickly size up an opponent before or during combat.
An enemy's challenge level is based on its level relative to your own and its rank. The system used to make this determination is commonly referred to as the Con System. An example of the Con System is shown below. Though you may encounter enemies with ranks not shown below, these are some of the most common in the game.
| Target's Relative Level |
Underling | Minion | Lieutenant | Boss/ Elite Boss |
Hero/ Archvillain |
| <-8 | DARK GRAY | DARK GRAY | DARK GRAY | DARK GRAY | DARK GRAY |
| -8 | DARK GRAY | DARK GRAY | DARK GRAY | DARK GRAY | LIGHT GRAY |
| -7 | DARK GRAY | DARK GRAY | DARK GRAY | DARK GRAY | GREEN |
| -6 | DARK GRAY | DARK GRAY | DARK GRAY | DARK GRAY | BLUE |
| -5 | DARK GRAY | DARK GRAY | DARK GRAY | LIGHT GRAY | WHITE |
| -4 | DARK GRAY | DARK GRAY | LIGHT GRAY | GREEN | YELLOW |
| -3 | DARK GRAY | LIGHT GRAY | GREEN | BLUE | ORANGE |
| -2 | LIGHT GRAY | GREEN | BLUE | WHITE | RED |
| -1 | GREEN | BLUE | WHITE | YELLOW | PURPLE |
| Even | BLUE | WHITE | YELLOW | ORANGE | PURPLE |
| +1 | WHITE | YELLOW | ORANGE | RED | PURPLE |
| +2 | YELLOW | ORANGE | RED | PURPLE | PURPLE |
| +3 | ORANGE | RED | PURPLE | PURPLE | PURPLE |
| +4 | RED | PURPLE | PURPLE | PURPLE | PURPLE |
| >+4 | PURPLE | PURPLE | PURPLE | PURPLE | PURPLE |
Beneath the name and difficulty level of a hostile target, you will see the faction or enemy group your target belongs to.
At the bottom of of the center of the window are Hit Point and Endurance bars. These bars function identically to the bars in your Status Window with one exception: The Hit Point bar for any hostile target is displayed in red regardless of how many hit points the target has remaining. Hovering the mouse pointer over these bars without clicking or hitting any keys on the keyboard for a few seconds will allow you to see the exact numbers of Hit Points and Endurance your target has remaining.
On the left side of the Target Window you will see the level of your target.
On the right side of the window you will see a hostile target's rank.
Friendly NPCs
When selecting a friendly or neutral NPC target, the target's name will be displayed at the top of your Target Window. The color of the target's name in this window is an indicator of what sort of target it is. The name of any NPC that will not enter combat is displayed in white. Colors of the names of any friendly NPCs (such as pets or rescued hostages that will take part in combat) is determined using the same Con System as hostile targets.
If a friendly NPC target belongs to a particular faction, this faction will be shown below the NPCs name. Any summoned pets or entities will display the name of the character to whom they belong instead of a faction.
If an NPC is capable of taking damage, it will have a set of Hit Point and Endurance bars under its name in the Target Window.
On the left of this window you will see the level of the NPC displayed if it has one.
On the right side of the Target Window, you will see the rank of an NPC displayed if it has one.
Friendly Players
When a Player Character is selected as a target, its name will be displayed at the top of the Target Window in green.
If the character is associated with a Super Group, the name of the Super Group will be displayed beneath their name.
Every friendly character will have have a set of Hit Point and Endurance bars under its name in the Target Window.
On the left side of the window you will see an icon representing the character's Origin. Beneath this icon will be the current combat level of the character. The combat level of the character may be different from the actual level of the character if they are sidekicked, exemplared, or have gained enough experience to level up, but have not yet visited a trainer.
On the right side of the Target Window will be an icon representing the character's Archetype. Below this icon, the character's Origin and Archetype will be spelled out.
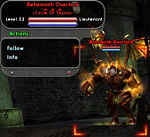
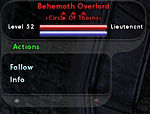
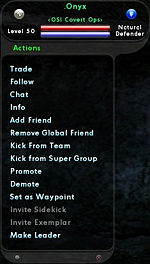
Action Window
The Action Window may be opened by clicking on "Action" on the outer edge of the Target Window.
With no targets selected, the Action window will not display.
With hostile targets selected, you will be able to select from the following options:
- Follow - This will cause your character to attempt to follow your current target. Even if you change targets, you will continue to track the target you originally selected with the Follow option. You can cancel the Follow option by either selecting it again, or manually moving your character. Teleporting or being teleported will also cause you to stop following your target.
- Info - This will open the Info Window, displaying information on your currently selected target.
With friendly Player Character targets selected, you will be able to select from the following options:
- Trade - If the currently selected character is within range, this will open the Trade Window with the currently selected character as your trade partner.
- Follow - This will cause your character to attempt to follow your current target. Even if you change targets, you will continue to track the target you originally selected with the Follow option. You can cancel the Follow option by either selecting it again, or manually moving your character. Teleporting or being teleported will also cause you to stop following your target.
- Chat - Selecting this option will activate the Chat Line and prime it with a /tell command using the targeted character's name.
- Info - This will open the Info Window, displaying information on the currently selected character.
- Add/Remove Friend - You may select "Add Friend" to add this character to your local server Friends list. If this character is already in your Friends list, you may select "Remove Friend" to remove them from it.
- Add/Remove Global Friend - You may select "Add Global Friend" to add this character to your Global Friends list. If this character is already in your Global Friends list, you may select "Remove Global Friend" to remove them from it.
- Invite to/Kick from Team - These options are only available if you are either solo or are the leader of your team.
- Invite to/Kick from Super Group - If your rank in your Super Group has sufficient privledges, you may use "Invite to Super Group" to invite new members to join your group. If a character is already in your Super Group, you may use the "Kick from Super Group option to remove them from the group is you have sufficient privledges and are ranked higher than the character you are trying to kick.
- Promote - If your rank in your Super Group has sufficient privledges, you and your target both belong to the same Super Group, and you are ranked at least one level higher than the character you have targeted, you may use this option to promote the character you have targeted one rank in the Super Group.
- Demote - If your rank in your Super Group has sufficient privledges, you and your target both belong to the same Super Group, and you are ranked at least one level higher than the character you have targeted, you may use this option to demote the character you have targeted one rank in the Super Group.
- Set as Waypoint - As long as you are on the same map, this will cause the diretion of the currently selected character to show in your Nav Window's compass.
- Invite Sidekick/Lackey - Invites the selected character to become your Sidekick or Lackey.
- Invite Exemplar/Malefactor - Invites the selected character to become your Exemplar or Malefactor.
- Make Leader - If you are the leader of your current team, this will allow you to pass leadership to the currently selected character.
The Nav Window may be opened by clicking on "Nav" in the Status Window or selecting "Nav" from the Menu Window.
The following additional windows may be accessed from the Nav Window:
- Map
- Contact
- Mission
- Clues
- Badge
In the top of the Nav Window is a compass which displays the direction you are currently facing. If you have a waypoint selected, the waypoint's icon will be displayed in your compass, indicating the direction in which your waypoint is located.
When you select a waypoint, the name of the waypoint will display below the compass.
If you or your team leader selects a mission from the Mission Window, the mission's primary objective will be displayed beneath the compass. If you are not currently on the map where your mission is located, the location of your mission will be displayed below the primary objective. Once you enter your mission map, any secondary objectives for your current mission will display below your primary mission objective.
Map Window
The Map Window may be opened either by clicking on "Map" on the outer edge of the Nav Window or selecting "Map" from the Menu Window.
At the top of this window are two tabs labeled "City" and "Zone" or "Mission". Clicking on the "City" tab will display a map of Paragon City for Heroes, or a map of the Rogue Isles for Villains. Selecting the "Zone" or "Mission" tab will display a map of the zone or mission you are currently located in.
In zone maps, the name of the zone will appear in the lower left corner of the map. In the lower right corner is a dropdown Options menu. You may click on this menu to turn the different icons and names on your map on or off.
On the right side of the window is a slider that allows you to zoom in or out on the map. Sliding the marker up will zoom out, while sliding the marker down will zoom in. If you zoom in far enough that the entire map no longer fits in the Map Window, you may drag the map around inside the window to view other areas on the map. If you move, the map will automatically reposition in the window with you in the center.
Fog of War
Until you have visited a location on your map, it will not appear with full clarity. This is referred to as "fog of war." Areas you have not visited on zone maps will be grayed-out, while mission maps are completely dark except for the areas you have explored. On mission maps, if any team member visits an area on the map, it becomes visible on the map for everyone on the team. On zone maps, only the areas you have visited will become clear on your map.
Map Icons
There are several common map icons you should be familiar with. Most of these icons can be seen even if their location is covered by "fog of war."
need images of the map icons for the table
| Icon | Represents |
| Your Character | |
| Monorail Station | |
| Ferry | |
| Hospital | |
| Neighborhood (Approximate Center of A Neighborhood) | |
| Arena | |
| Teammates | |
| Team Leader | |
| Mission Entrance (Not Selected) | |
| Mission Entrance (Selected) | |
| Mission Objective Location | |
| Hostage Escort Destination | |
| Contact | |
| Trainer | |
| Store | |
| Thumbtack | |
| City Zone Entrance | |
| Level Restricted or Hazard or Trial Zone Entrance |
Waypoints and Thumbtacks
You can click on any Icon on the map (except for the one that represents you) to make it a waypoint. When you have set a waypoint, it acquires an animated highlight on your map, and the icon appears on your compass in the Nav Window. When you are facing toward a waypoint, the distance to it will be displayed in either yards or miles. Basically, if you know where you want to go, making that spot a waypoint will make it much easier to get there. Naturally, if you set a waypoint on a mobile icon (i.e. a teammate), the direction and distance to your waypoint will change as the waypoint moves around. You may only select one waypoint at a time.
Sometimes, during missions, the game will set a waypoint for you, pointing the way toward your next mission objective. These game-set waypoints appear in red, and it is possible to have more than one of these waypoints active at the same time. It is also possible to have an active player-set waypoint active at the same time as a game-set waypoint.
A thumbtack is a sort of portable waypoint. You can right click anywhere on a zone or mission map to set a thumbtack at that location. You may even set a thumbtack in an area covered by fog of war. You may only have one thumbtack visible at any time. If you right click on another part of the map, your thumbtack will move to that new location. If you right click on the thumbtack its self, it will be removed from the map.
Once you have a thumbtack set, you can use it like any other map icon, including using it as a waypoint if you wish. Note that if you log off, the thumbtack will be gone when you return to the game.
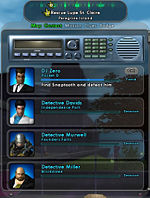
Contact Window
The Contact Window may be opened either by clicking on "Contact" in the Nav Window or selecting "Contact" from the Menu Window.
This window displays a list of all of the contacts you have been introduced to. Each contact in your list will have a picture on the left side of their entry. To the right of the picture will be the name of the contact, the contact's location, and a bar indicating how well you know this contact. Every time you complete a mission for a contact, the bar will fill a little. When you reach a certain level of familiarity with a contact, a "Call" button will appear to the right of the contact's information. Once this button appears, you may speak with this contact from any zone map by clicking on the "Call" button.
If you have an active mission from any contacts, the mission will be shown below the contact's level of familiarity. If you have opened a contact's story arc, a small book icon will be displayed to the right of the contact's name and location.
Most of the time, the contacts in this window will appear in the order in which they were first introduced to you. Newer contacts will appear at the top of your list and older contacts will appear at the bottom of your list. As an exception to this, any contact with whom you currently have a mission active will be pushed to the top of your contact list.
Clicking on any contact in your list will select them as a waypoint in your Nav Window.
After reaching level 5 and speaking with speaking with a Detective, Heroes can obtain a Police Band Radio. Once acquired, the radio will appear in the Contact Window at the top of contact list. Heroes can then click on the radio to pick up Police Band Missions in any zone which is appropriate to their currently level. Each Police Band Mission will fill the familiarity bar of that zone's Detective. Once the Detective's bar is full, you will have to speak directly to the Detective to obtain a Safeguard Mission. When the Safeguard mission is complete, the Detective's familiarity bar will be cleared and you can begin filling it in again.
Similarly, after villains reach level 5 and speak to a Broker, they will obtain a Newspaper. Once a Villain has done this, the Newspaper will appear at the top of the contact list. Villains can then click on the newspaper to pick up Newspaper Missions in any zone appropriate to their level. Each Newspaper Mission will fill the familiarity bar of that zone's Broker. Once the Broker's bar is full, you will have to speak directly to the Broker to obtain a Mayhem Mission. When the Mayhem mission is complete, the Broker's familiarity bar will be cleared and you can begin filling it in again.
Mission Window
The Mission Window may be opened either by clicking on "Mission" in the Nav Window or selecting "Mission" from the Menu Window.
In this window, you can view a brief description of all of the missions you have agreed to undertake. At the top of your list of missions you will see your character's name on the left and current notoriety setting on the right. In each description you will see the mission's primary objective in the upper left, location in the upper right, and the first couple of lines from your contact's briefing. If you click on a mission in this window, it will highlight the mission's entry and a "more..." button will appear in the entry's lower right corner. Click the "more..." button to view the mission's information in full detail. You will be able to view the initial mission briefing, see any progress made so far, and see if you have found any clues.
Selecting any mission in this list will set it as your current waypoint if you are located the same zone as the mission entrance is located.
When you join a team, this window will show you all of the missions any team members in the same zone currently have and will allow you to see each member's notoriety setting. If you are your team's leader, you may select a mission for your team by selecting a mission's description and clicking the "Select Mission" button at the bottom of the Mission Window. This will set the active task set the mission's entrance as a waypoint for all of your team's members.
Clues Window
The Clues Window may be opened by clicking on "Clues" in the Nav Window or selecting "Clues" from the Menu Window.
Depending on the mission, you may need to unearth clues to keep the narrative moving forward. Each time you obtain a new clue, it flashes on the screen and may then be accessed in the "Clues" tab. In this tab is a list of clues you have discovered in the course of your adventures.
Clues provide valuable information that might come in handy for your broker or might point you to the next step in your current mission. This is the key in many cases, as you need to find all clues to fully complete a given mission.
On occasion, certain clues might persist after you've seemingly completed all tasks related to that mission. In that case, the chances are near 100% that there's something you have yet to do that relates directly to that clue--this is why it's important to read all of them when you get them!
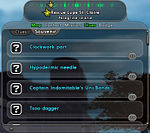
Souvenirs are clues you are allowed to keep which provide a historical account of any story arcs you have previously completed. In the "Souvenirs" tab of this window, you will see a list of all the souvenirs you have collected. To view the details of any of these souvenirs, click the ">>" button in the lower right to expand the souvenir's information. To collapse the entry again, click on the "<<" button in the lower right.
Badge Window
You may open the Badge Window by clicking "Badge" in the Nav Window or selecting "Badge" from the Menu Window.
This window shows you all of the badges you currently have and in many cases shows you progress toward other badges.
There are several types of badges, each having its own tab at the top of this window.
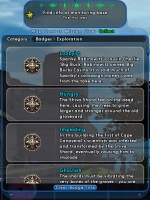
- Exploration Badges - Exploration badges are earned simply for finding a location of particular interest. Just traveling through the area will award you with the badge. Locations that award Exploration Badges are marked with an Exploration Badge Marker.
- History Badges - History badges are collected by reading plaques throughout Paragon City and the Rogue Isles. Various plaques are located throughout the game and some relate to one another. By reading all of the plaques related to a particular subject, you can earn a History badge on that subject.
- Accomplishment - Accomplishment badges are awarded for completing certain missions and Task Forces.
- Achievement - Achieving specific goals, such as defeating a large number of a specific enemy type or taking a large amount of damage, can earn these badges. Some of these badges will have a meter showing you your progress toward obtaining the badge.
- Accolades - Most of these badges are earned not by themselves, but by collecting badges in the Exploration, History, Accomplishement, and Achievement areas that all related to one another. Once you have all the badges an Accolade requires, you will be issued the Accolade badge. Some Accolade badges also award your character with extra abilities or permanent boosts to your Hit Points or Endurance. Other Accolades may be awarded for special events or anniversaries in the "City of" franchise.
- Gladiator - Gladiator badges are obtained by accomplishing specific tasks that unlock creatures for use in Arena Gladiator Matches.
- Veteran - For every three months of active subscription to City of Heroes or Villains, your account will be awarded a new Veteran Reward badge. To claim any rewards that are offered along with these badges, click on the "Veteran" tab in your Badge Window. Rewards related to any Veteran Rewards badge will be listed along with the related badge. In the lower right corner of each reward will be a button that you can click to claim your reward.
With the exception of Gladiator badges, clicking on any badge you have obtained will set your character's Badge Title. This title appears under your name when other players are viewing your name above your character's avatar in the game. You may clear your badge title at any time by clicking on the "Clear Badge Title" button at the bottom of the Badge Window.
If you are currently associated with a Super Group, you will also be able to view any badges that have been obtained by your Super Group. At the bottom of the Badge Window you will find a button labeled "Super Group Badges". Clicking on this button will switch you to viewing Super Group badges. All of the same tabs that appear in the personal badges also appear in the Super Group badges, but Super Groups are only able to aquire badges under two categories:
- Exploration - Super Group Exploration badges are earned by visiting all of the Exploration Badge markers in a zone while in Super Group Mode. If you have already collected some of the Exploration Badges in a zone but weren't in Super Group Mode, you merely have to revisit the markers for those badges while in Super Group Mode.
- Achievement - Super Group Achievement badges are rewarded for achieving specific goals, such as defeating a large number of a specific enemy type or taking a large amount of damage. Any work done toward these badges must be done in Super Group Mode in order to count. Some of these badges will have a meter showing you your Super Group's progress toward obtaining the badge.
Menu Window
You may open the Menu Window by clicking on "Menu" on the Status Window or typing "/menu" into the Chat Line. By default, this window may also be opened by pressing the '\' key.
The following windows may be accessed from the Menu Window:
- Chat
- Friends
- Team
- Super Group
- Tray
- Powers
- Inspirations
- Enhancements
- Nav
- Map
- Contacts
- Clue
- Badge
- Target
- Help
- Costume
- I.D.
- Personal Info
- Chat Handle
- Options
- Support
In addition to opening or closing each of the above windows, you may also select "Quit" from the Menu Window to either return to the login screen or quitting to your desktop.
When logging out, you will remain visible and can still be attacked for 30 seconds. If you press any key during this time, the countdown will be aborted and you will not log out. When the countdown reaches zero, you will either be sent back to the login screen.
If quitting to the desktop, you will have the option to quit out of the game before the 30 second timer has expired. If you do this, you will be sent out to the desktop, but your character will remain visible in the game and may still be attacked until the remainder of your 30 second timer has expired.
Help Window
The Help Window may be opened by selecting "Help" from the Menu Window.
This window provides a quick reference for almost everything in the game with topics ranging from Combat to Super Group Base construction. Select a general topic from the tabs at the top of the window. On the left side of the window you will see a list of terms that apply to that topic. Selecting any of these terms will display a more detailed explanation of the term on the right side of the window.
Costume Window
The Costume Window may be opened by selecting "Costume" from the Menu Window.
In this window you will see all of the costume slots you have unlocked, and will be able to switch between costumes for your character's avatar.
I.D. Screen
The I.D. Screen may be accessed by selecting "I.D." from the Menu Window.
On this screen, you can view information about your character, such as:
- Name - The name you chose at character creation with any additional titles you have selected over time.
- Origin - The Origin you chose at character creation.
- Archetype - The Archetype you chose at character creation.
- Super Group Association - The Super Group you are currently affiliated with (if any.)
- Hit Points - Your maximum Hit Points.
- Endurance - Your maximum Endurance.
- Security/Threat Level - Your current level.
- Total XP - The total Experience Points you have accumulated.
- XP Remaining - The amount of Experience Points you need to aquire to reach your next level.
- Influence/Infamy - The amount of Influence or Infamy you currently have to saved.
- Known Powers - A list of all the powers you have selected or earned access to.
- Character Description - Your character's personal biography.
- Battle Cry - Your character's personal catch phrase.
You may return from this screen to the main user interface by clicking on the button in the lower right corner of the I.D. Screen.
Character Description
Your Character Description can be edited at any time by opening the I.D. Screen and editing the Character Description field. If you wish, you may copy from any text document and paste to this window. You are limited to a maximum of 1023 characters (including spaces and carriage returns) in the Character Description field.
Battle Cry
Your character's Battle Cry may be edited at any time by opening the I.D. Screen and editing the Battle Cry field. You are limited to a total of 32 characters (including spaces) in this field. By default, when you press the F10 key on the keyboard, your character will shout out their battle cry and perform the "attack" emote.
Info Window
The Info Window has four main forms and may be opened in several different ways:
- Player Character Info - Displays information about your character or other players' characters.
- Personal Info - Open either by selecting "Personal Info" from the Menu Window or entering "/infoself" in the Chat Line.
- Friendly PC Info Window - Open either by right clicking on a friendly PC and selecting "Info", targeting a friendly PC and selecting "Info" from the Action Window, or targeting a friendly PC and entering "/info" in the Chat Line.
- Enemy PC Info Window - Open either by right clicking on an enemy PC and selecting "Info", targeting an enemy PC and selecting "Info" from the Action Window, or targeting an enemy PC and entering "/info" in the Chat Line.
- Non-Player Character Info - Displays information about Non-Player Characters.
- Enemy NPC Info Window - Open either by right clicking on an enemy NPC and selecting "Info", targeting an enemy NPC and selecting "Info" from the Action Window, or targeting an enemy NPC and entering "/info" in the Chat Line.
- Friendly NPC Info Window - Open either by right clicking on a friendly NPC and selecting "Info", targeting a friendly NPC and selecting "Info" from the Action Window, or targeting a friendly NPC and entering "/info" in the Chat Line.
- Item Information Window - Displays information about various types of items.
- Enhancement Info Window - Open by right clicking on an Enhancement and selecting "Info."
- Salvage Info Window - Open by right clicking on an item in your Salvage Window and selecting "Info."
- Inspiration Info Window - Open by right clicking on an Inspiration in your Inspirations Window and selecting "Info."
- Power Info Window - Displays information about Powers and their effects.
- Power Description Info Window - Open by right clicking on any power icon either in your Tray Window or the Powers Window and selecting "Info."
- Effect Info Window - Open by right clicking on any status icon either outside of your Status Window or next to your Team Window or Pets Window and selecting "Info."
Player Character Info
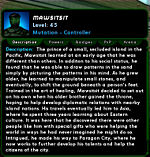
At the top of the Player Character Info Window will be a small character portrait on the left with the character's name, level, Origin, and Archetype on the right.
There are several tabs in Player Character Info Windows. Depending on circumstances, some of these tabs may not be available when viewing information on some player characters. The tabs that might appear in the Player Character Info Window are as follows:
- Description - Any text entered by a player in a character's Character Description field on the I.D. Screen will appear in the Info Window. If no text has been entered in the Character Description field, this tab will not appear in the Info Window.
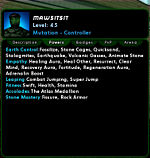
- Powers - This tab lists all of the powers that have been acquired by a character. These powers will be grouped by Primary Power Set, Secondary Power Set, Pool Powers, Accolades, Ancillary or Patron Pool Powers, and IO Set Enhancement Bonuses. This tab does not appear when viewing information on a character of the alignment opposite your own.
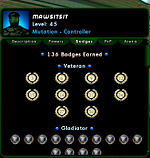
- Badges - In this tab, you can view the badges a character has collected. At the top of this tab is a tally of the total number of badges the character as acquired. The badges shown are grouped by Veteran, Gladiator, Accolade, Achievement, Accomplishment, History, and Exploration. Hovering the mouse pointer over any of the icons in the Badges tab will enlarge the icon and display the name of the badge.
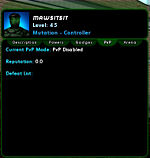
- PvP - This information tells you the character's current record in Player vs. Player battles. You can see the character's current PvP mode, Reputation, and a list of other characters that this character has recently defeated.
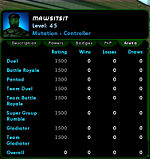
- Arena - You can view a player's record in Arena matches in this tab. You can see the character's rating and record in in each of the various types of matches in the Arena as well as their overall record.
Non-Player Character Info
At the top of this Info Window is a small portrait of the NPC on the left and the NPCs name, level, faction, and rank on the right. There are two tabs in the lower portion of the window labeled "Description" and "Salvage." A brief description of the NPC is contained in the "Description" tab. The "Salvage" tab will list all of the Salvage items that you might obtain by defeating the NPC as an enemy.
Item Info
expand
Powers Info
expand
Support Window
The Support Window may be opened by selecting "Support" from the Menu Window.
From the Support Window, you can report suspected bug, violations of terms of service (either through exploits or cheats, or through harassment), or call for help from a game master or game manager (GM) to deal with real emergency situations.
Petition Window
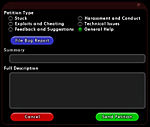
When you open the Support Window, you start in the petition interface. Petitions are generally filed whenever intervention from a GM is required to resolve an issue. Begin filing a petition by first selecting the category which best describes the issue you are experiencing:
- Stuck
- Your character is in a location where they are unable to move normally. Say, for example, you have fallen off of a map. You might be able to see buildings and the sky far, far above your head, but you're located far, far below the street. If you've already tried the /stuck command and tried logging out and logging back in and still can't get back onto the map, a petition may be your only recourse.
- You are in a timed mission and the hostage you are escorting has fallen off the map. Or maybe you're on a "defeat all" mission and one of the mobs on the map was knocked into a ceiling where you can see their feet, but can't target or attack them. Maybe you've reset the mission once already for the same reason and had it happen again. Maybe the mission is timed and there's no chance you'll be able to start from scratch and finish the mission again before the timer can expire. Your only recourse may be to summon a GM to have them fix the situation for you.
- Exploits and Cheating
- If something in the game is broken or "working as intended" but allows for players to circumvent the normal game mechanics for profit, this is known as an exploit. For example, if a bug were introduced to the game that somehow allowed any player who was stealthed to defeat Hamidon with one shot, using this method to farm Hamidon Origin Enhancements would probably be considered an exploit. Use of exploits is a violation of the terms of agreement and is a potentially bannable offense.
- Any method of directly manipulating the underlying functionality of the game (whether simply for entertainment purposes or to gain an unfair advantage) is cheating. (Being repeatedly beaten by the same player in a PvP zone is not cheating.)
- Feedback and Suggestions
- Any suggestion you may have for improving the game which is not related to a bug should be filed under this category.
- Harrassment and Conduct
- Any violations of the City of Heroes Rules of Conduct or EULA that don't fall under a more specific category should be filed under this category.
- Technical Issues
- Any technical issue that does not fall under a more specific category that you need help resolving should be filed under this category. If the issue does not actually require help to resolve or is just a minor nuisance, it should probably be reported using the Bug Report Window instead.
After selecting a category, fill in a brief description of your issue in the "Summary" field. This field is limited to check number characters.
Then describe your issue in the "Full Description" field. Although you are limited to check number characters in this field, getting as much of the following information (if it applies to your current situation) into your petition will help to speed the process of resolving your issue:
- The Map or Zone you are in. If you're not sure, you can find this information using the /whereami command.
- The name of the contact you received the mission from.
- The name or primary objective of the mission.
- The amount of time remaining in your mission. (You may want to note that in the "Summary".)
- Exactly what is preventing you from finishing your mission.
- The nature of the exploit or cheat.
- Names of any characters involved.
- The exact text of any harassment-related chat.
If you do not have enough room to fully detail your issue, get the main points into the Petition Window. You will be able to add more information through the "My Stuff" tab at the PlayNC Support Center.
In general, petitions filed for help with an issue you are having with your character or a mission will be tracked and recorded in your account at the PlayNC Support Center and may be viewed from the "My Stuff" tab. Any details regarding petitions filed against another player will be discussed exclusively between NCSoft's Player Relations Department and the registered account owner. If NCSoft determines that any rules are broken or subsequent action should be taken, they will not be able to relay any information about the incident or the account involved.
Visit PlayNC.com for more information on the City of Heroes User Agreement or City of Heroes Rules of Conduct.
When you have completed filling in the information in the Petition Window, click the "Send Petition" button to submit your petition.
Bug Report Window
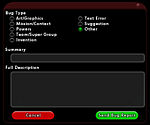
The Bug Window may be reached by clicking on the "File Bug Report" button in the Petition Window.
Bug reports should be filed whenever you encounter an anomaly or error in the game that does not require the immediate intervention of a GM. As with filing a petition, the first step in reporting a bug is to select the category which best describes the issue you have uncovered:
- Art/Graphics - Any issue directly related to graphics or in-game art. This includes things like the visual effects on powers, textures on objects, deformed polygons, and clipping on costume pieces.
- Mission/Contact - Any issue directly related to missions or contacts. For example, a mission with an object you need to protect three floors above you being attacked as soon as you enter the mission door would fit under this category. A contact who's indicating an open story arc in your Contacts Window who will not offer missions to you (assuming you do not already have three active tasks) would be another example.
- Powers - Any issue related to the mechanics of a power. If a power does not fuction correctly (i.e. something that should drain Endurance does not do so or knocks a target back instead) your bug report would fall under this category.
- Team/Super Group - Any issue related directly to the mechanics of functions specific to Teams or Super Groups. This category includes issues like setting Super Group permissions and inviting other players to your Team.
- Invention - Any issue related directly to the Invention system or Invention Tables. (Issues with Consignment Houses or the Black Market probably don't count.)
- Text Error - Any spelling or grammar error encountered in the game's text.
- Suggestion - Any suggestion for functionality changes that aren't actually bugs.
- Other - All other issues that are not covered by any other category.
After selecting a category, fill in a brief description of your bug in the "Summary" field. This field is limited to check number characters.
Describe your bug in detail in the "Full Description" field. Although you are limited to check number characters in this field, getting as much of the following information (if it applies to your current situation) into your bug report will help developers to disposition the issue and locate the problem in the game's code:
- How to recreate the bug.
- Location where you encountered the bug. (If you do not move from the location where the bug ocurred, you do not need to add this. The bug report interface automatically adds your current location to the report when you submit it.)
- The name of the contact and/or mission you found the problem in.
If you do not have enough room to fully detail your issue, get the main points into the Petition Window. You will be able to add more information through the "My Stuff" tab at the PlayNC Support Center.
When you have completed filling out the fields in the Bug Report Window, click the "Send Bug Report" button to submit your bug report.
Options Window
note to self: this is going to either require a bunch of screenshots or a lot of real-time editing

