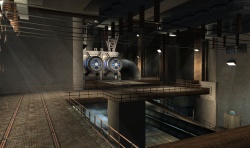
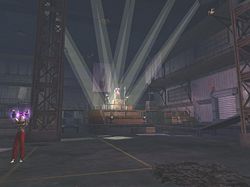
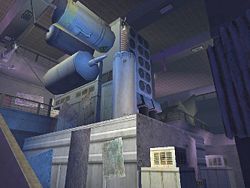
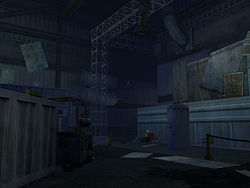
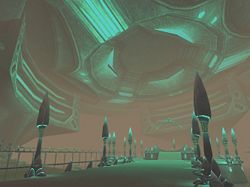
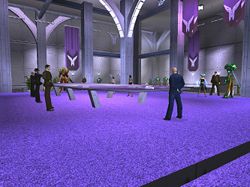
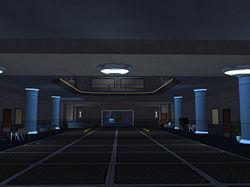
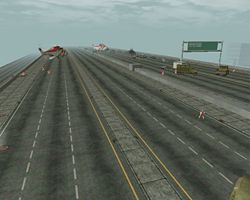
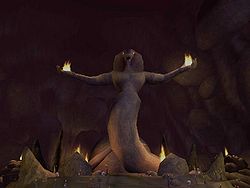
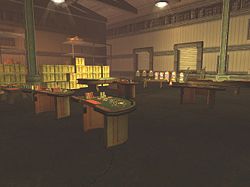
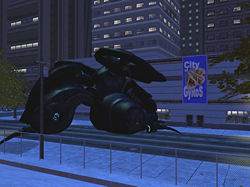
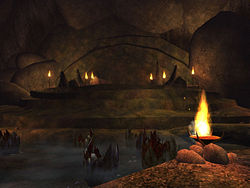
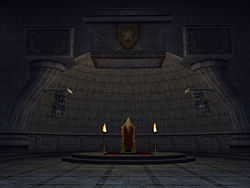
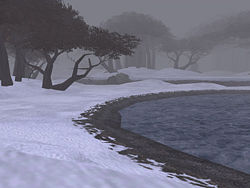
Difference between revisions of "Demo Editing/Scenic Maps"
Scuzzbopper (Talk | contribs) m (→Misdirected Portal: loc detail) |
Felderburg (Talk | contribs) m (Proper DW link) |
||
| (19 intermediate revisions by 4 users not shown) | |||
| Line 1: | Line 1: | ||
| + | {{spoiler}} | ||
| + | |||
== Overview == | == Overview == | ||
| − | Of the available maps used by the game, there are certain unique maps which either utilize an artified version of the standard map sets (often with art specific to a particular villain group) or are wholly unique in art and/or design. | + | Of the available maps used by the game, there are certain unique maps which either utilize an artified version of the standard map sets (often with art specific to a particular villain group) or are wholly unique in art and/or design. These maps are often of particular interest in demo editing as they provide for a unique setting or backdrop which stands out from the common map sets. |
| + | |||
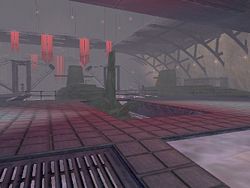
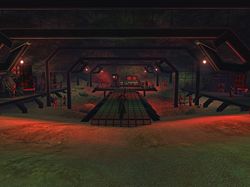
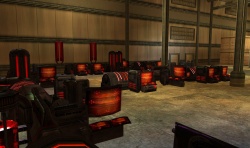
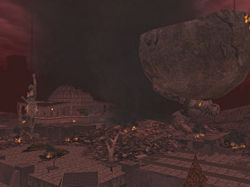
| + | This page provides a listing of screenshots representing these unique or scenic maps, along with associated information which may be useful for demo editing. This includes the following: | ||
| + | |||
| + | * '''Demo Map Name:''' This is the file name of the map required to display the map in question using a demo, via the demo '''Map''' command. | ||
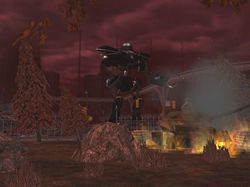
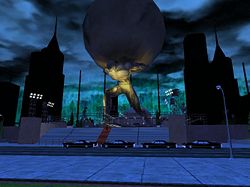
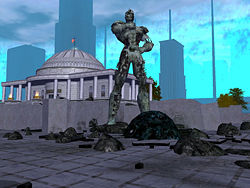
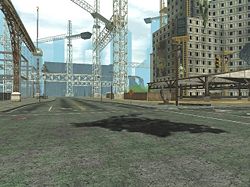
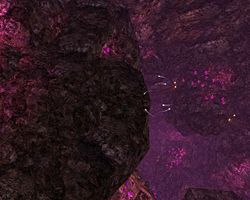
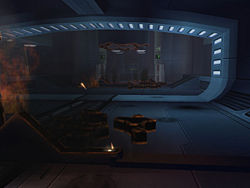
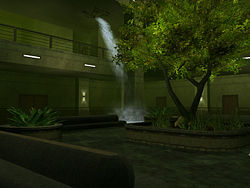
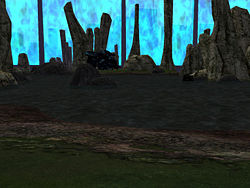
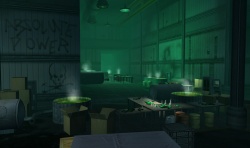
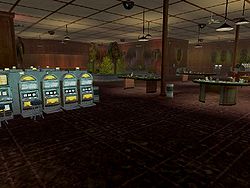
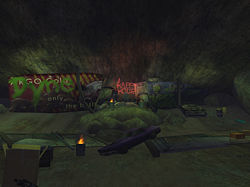
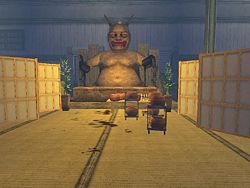
| + | * '''CAM POS:''' This provides the variables, as used by demos, for positioning the demo POV of the screenshot as shown. This is of particular use for creating demos from scratch as it provides a reference point within the map for placing the camera and other entities. Without '''POS''' values it can be very difficult to work with a map from scratch as some way to determine the coordinates which lie within the boundaries of the map are required to create a meaningful demo recording. The '''POS''' values given are that of the camera as it was placed to create the screenshot shown. | ||
| + | * '''CAM PYR:''' Similar to '''POS''' entry, this gives the demo '''PYR''' variables, as used by a demo, which represent the orientation of the camera corresponding to the screenshot shown. | ||
| + | * '''Missions:''' This provides a list of internal links to missions known to utilize the map in question. It is not always simplest to create a demo from scratch, and this information gives the mission where the map is encountered, allowing players to actually run that particular mission for "live" recording. | ||
| + | * '''Notes:''' Any other comments, remarks, or items of interest for the map in question are provided here. | ||
| + | |||
| + | This is a partial list. Some maps may be represented with more than one screenshot to illustrate different views or art. | ||
| − | + | With the live release of [[Issue 14]] and the [[Mission Architect]], players will be able to access many of the unique and scenic maps via missions created using the Mission Architect. For demo recording and movie-making purposes, this will provide easier access to those maps available in this fashion. Rather than editing a demo to use a specific map, or trying to track down a specific mission which uses a particular map for "live" filming, movie-makers will simply be able to create a custom mission in the Mission Architect with the map and setting of their choice. | |
| − | + | == See Also == | |
| − | + | ||
| − | + | ||
| − | + | ||
| − | + | ||
| − | + | [[Mission Architect Unique Maps]] | |
== List of Scenic Maps == | == List of Scenic Maps == | ||
| − | ===5th Column Overthrow=== | + | === 5th Column Overthrow === |
{| border="0" cellspacing="0" cellpadding="5" align="left" | {| border="0" cellspacing="0" cellpadding="5" align="left" | ||
|-valign="top" | |-valign="top" | ||
| − | | [[ | + | | [[File:ColumnEnd1.jpg|thumb|250px|center|{{center|5th Column Overthrow Finale}}]] |
| '''Demo Map Name:''' ''MAPS/MISSIONS/UNIQUE/FLASHBACK/FB_COLUMN_OVERTHROW/FB_5TH_COLUMN_OVERTHROW_M4.TXT'' | | '''Demo Map Name:''' ''MAPS/MISSIONS/UNIQUE/FLASHBACK/FB_COLUMN_OVERTHROW/FB_5TH_COLUMN_OVERTHROW_M4.TXT'' | ||
| Line 27: | Line 35: | ||
'''Missions''' | '''Missions''' | ||
| − | * [[Mender Lazarus Task Force#Remove the 5th Column leaders | Remove the 5th Column leaders]] | + | * [[Mender Lazarus Task Force#Remove the 5th Column leaders|Remove the 5th Column leaders]] |
|- | |- | ||
|} | |} | ||
{{clr}} | {{clr}} | ||
| − | ===Arachnos Base On Fire=== | + | === Arachnos Base On Fire === |
{| border="0" cellspacing="0" cellpadding="5" align="left" | {| border="0" cellspacing="0" cellpadding="5" align="left" | ||
|-valign="top" | |-valign="top" | ||
| − | | [[ | + | | [[File:Experiment236Rampage.jpg|thumb|250px|center|{{center|Experiment 236 Rampage}}]] |
| '''Demo Map Name:''' ''MAPS/MISSIONS/UNIQUE/ARACHNOS_UNIQUE/ARACHNOS_GENERAL_ONFIRE_01.TXT'' | | '''Demo Map Name:''' ''MAPS/MISSIONS/UNIQUE/ARACHNOS_UNIQUE/ARACHNOS_GENERAL_ONFIRE_01.TXT'' | ||
| Line 44: | Line 52: | ||
'''Missions''' | '''Missions''' | ||
| − | * [[Dmitri Krylov#Defeat Experiment 236 and witnesses | Defeat Experiment 236 and witnesses]] | + | * [[Dmitri Krylov#Defeat Experiment 236 and witnesses|Defeat Experiment 236 and witnesses]] |
|- | |- | ||
|} | |} | ||
{{clr}} | {{clr}} | ||
| − | ===Arachnos Base On Fire II=== | + | === Arachnos Base On Fire II === |
{| border="0" cellspacing="0" cellpadding="5" align="left" | {| border="0" cellspacing="0" cellpadding="5" align="left" | ||
|-valign="top" | |-valign="top" | ||
| − | | [[ | + | | [[File:ArachnosHellionsAttack01.jpg|thumb|250px|center|{{center|Hellions Invade Arachnos Base}}]] |
| '''Demo Map Name:''' ''MAPS/MISSIONS/UNIQUE/ARACHNOS_UNIQUE/ARACHNOS_MERCY_ONFIRE_01.TXT'' | | '''Demo Map Name:''' ''MAPS/MISSIONS/UNIQUE/ARACHNOS_UNIQUE/ARACHNOS_MERCY_ONFIRE_01.TXT'' | ||
| Line 61: | Line 69: | ||
'''Missions''' | '''Missions''' | ||
| − | * [[Mongoose#Clear Hellions from Arachnos Base | Clear Hellions from Arachnos Base]] | + | * [[Mongoose#Clear Hellions from Arachnos Base|Clear Hellions from Arachnos Base]] |
|- | |- | ||
|} | |} | ||
{{clr}} | {{clr}} | ||
| − | ===Arachnos Snake-Infested Base=== | + | === Arachnos Snake-Infested Base === |
{| border="0" cellspacing="0" cellpadding="5" align="left" | {| border="0" cellspacing="0" cellpadding="5" align="left" | ||
|-valign="top" | |-valign="top" | ||
| − | | [[ | + | | [[File:ArachnosSnakes01.jpg|thumb|250px|center|{{center|Arachnos Base Snake Infestation}}]] |
| '''Demo Map Name:''' ''MAPS/MISSIONS/UNIQUE/ARACHNOS_UNIQUE/ARACHNOS_SNAKES_01.TXT'' | | '''Demo Map Name:''' ''MAPS/MISSIONS/UNIQUE/ARACHNOS_UNIQUE/ARACHNOS_SNAKES_01.TXT'' | ||
| Line 78: | Line 86: | ||
'''Missions''' | '''Missions''' | ||
| − | * [[Kalinda#Clear Snakes out of Lab | Clear Snakes out of Lab]] | + | * [[Kalinda#Clear Snakes out of Lab|Clear Snakes out of Lab]] |
|- | |- | ||
|} | |} | ||
{{clr}} | {{clr}} | ||
| − | ===Arachnos Sub Base=== | + | === Arachnos Sub Base === |
{| border="0" cellspacing="0" cellpadding="5" align="left" | {| border="0" cellspacing="0" cellpadding="5" align="left" | ||
|-valign="top" | |-valign="top" | ||
| − | | [[ | + | | [[File:SubmersiblesBase1.jpg|thumb|250px|center|{{center|Underground Arachnos Sub Base}}]] |
| '''Demo Map Name:''' ''MAPS/MISSIONS/UNIQUE/FAULTLINE/SUBBASE/ARACHNOS_SUBBASE.TXT'' | | '''Demo Map Name:''' ''MAPS/MISSIONS/UNIQUE/FAULTLINE/SUBBASE/ARACHNOS_SUBBASE.TXT'' | ||
| Line 95: | Line 103: | ||
'''Missions''' | '''Missions''' | ||
| − | * [[Agent G#Stop Arbiter Sands and get the PCM | Stop Arbiter Sands and get the PCM]] | + | * [[Agent G#Stop Arbiter Sands and get the PCM|Stop Arbiter Sands and get the PCM]] |
|- | |- | ||
|} | |} | ||
{{clr}} | {{clr}} | ||
| − | ===Arachnos Test of Dedication=== | + | === Arachnos Test of Dedication === |
{| border="0" cellspacing="0" cellpadding="5" align="left" | {| border="0" cellspacing="0" cellpadding="5" align="left" | ||
|-valign="top" | |-valign="top" | ||
| − | | [[ | + | | [[File:ArachnosTrial1.jpg|thumb|250px|center|{{center|A Spider Weaves His Web Indoctrination}}]] |
| '''Demo Map Name:''' ''MAPS/MISSIONS/UNIQUE/FLASHBACK/SPIDER_WEAVES_HIS_WEB/SWHW_SNAKECAVES/SWHW_SNAKECAVES.TXT'' | | '''Demo Map Name:''' ''MAPS/MISSIONS/UNIQUE/FLASHBACK/SPIDER_WEAVES_HIS_WEB/SWHW_SNAKECAVES/SWHW_SNAKECAVES.TXT'' | ||
| Line 112: | Line 120: | ||
'''Missions''' | '''Missions''' | ||
| − | * [[Mender Tesseract Strike Force#Head to the Underground Lair | Head to the Underground Lair]] | + | * [[Mender Tesseract Strike Force#Head to the Underground Lair|Head to the Underground Lair]] |
|- | |- | ||
|} | |} | ||
{{clr}} | {{clr}} | ||
| − | ===Arachnos Warehouse=== | + | === Arachnos Warehouse === |
{| border="0" cellspacing="0" cellpadding="5" align="left" | {| border="0" cellspacing="0" cellpadding="5" align="left" | ||
|-valign="top" | |-valign="top" | ||
| − | | [[ | + | | [[File:ArachnosWarehouse1.jpg|thumb|250px|center|{{center|Arachnos Warehouse}}]] |
| '''Demo Map Name:''' ''maps/Missions/unique/V_Warehouse_Arachnos/V_Warehouse_Arachnos_30_Layout_02.txt'' | | '''Demo Map Name:''' ''maps/Missions/unique/V_Warehouse_Arachnos/V_Warehouse_Arachnos_30_Layout_02.txt'' | ||
| Line 129: | Line 137: | ||
'''Missions''' | '''Missions''' | ||
| − | * [[Willy Wheeler#Defeat all Arachnos Personnel | Defeat all Arachnos Personnel]] | + | * [[Willy Wheeler#Defeat all Arachnos Personnel|Defeat all Arachnos Personnel]] |
<!-- Okay, I confirmed this one live, but the last time thru I'm 90% sure it gave me a different map. Perhaps this mission cycles between the different "unique" Arachnos Warehouse maps? --> | <!-- Okay, I confirmed this one live, but the last time thru I'm 90% sure it gave me a different map. Perhaps this mission cycles between the different "unique" Arachnos Warehouse maps? --> | ||
| − | * [[Westin Phipps#Help Phipps in his plan against the Arachnos Rebels | Help Phipps in his plan against the Arachnos Rebels]] (first part - ''"Defeat Fortunata Amelee & Crew"'') | + | * [[Westin Phipps#Help Phipps in his plan against the Arachnos Rebels|Help Phipps in his plan against the Arachnos Rebels]] (first part - ''"Defeat Fortunata Amelee & Crew"'') |
| + | |||
| + | '''Notes''' | ||
| + | * The missions associated with this map may be randomly selecting between two or more different layouts for the Arachnos warehouse, of which this is one. | ||
| + | |- | ||
| + | |} | ||
| + | {{clr}} | ||
| + | |||
| + | === Atlas Park Destroyed === | ||
| + | |||
| + | {| border="0" cellspacing="0" cellpadding="5" align="left" | ||
| + | |-valign="top" | ||
| + | | [[File:FutureAtlas01.jpg|thumb|250px|center|{{center|Destroyed Atlas Park of the Future}}]] | ||
| + | | '''Demo Map Name:''' ''MAPS/MISSIONS/OUTDOOR_MISSIONS/V_OUTDOOR_ATLAS/RECLUSE_RUINED/V_OUTDOOR_ATLAS_RECLUSE.TXT'' | ||
| + | |||
| + | '''CAM POS:''' 497.320 84.925 -188.959 | ||
| + | |||
| + | '''CAM PYR:''' -0.018 0.911 -0 | ||
| + | |||
| + | '''Missions''' | ||
| + | * [[Ghost Widow#Go through the portal 2|Go through the portal]] (and corresponding ''Time After Time'' mission from any villain patron contact) | ||
| + | * [[Ghost Widow#Enter Destiny Portal and defeat Lord Recluse|Enter Destiny Portal and defeat Lord Recluse]] (and corresponding ''Time After Time'' mission from any villain patron contact) | ||
| + | |- | ||
| + | |} | ||
| + | {{clr}} | ||
| + | |||
| + | === Atlas Park Destroyed, Wrecked MegaMech === | ||
| + | |||
| + | {| border="0" cellspacing="0" cellpadding="5" align="left" | ||
| + | |-valign="top" | ||
| + | | [[File:AtlasMechWreck01.jpg|thumb|250px|center|{{center|Wrecked Council MegaMech in Future Atlas}}]] | ||
| + | | '''Demo Map Name:''' ''MAPS/MISSIONS/OUTDOOR_MISSIONS/V_OUTDOOR_ATLAS/RECLUSE_RUINED/V_OUTDOOR_ATLAS_RECLUSE.TXT'' | ||
| + | |||
| + | '''CAM POS:''' 541.404 4.954 -502.910 | ||
| + | |||
| + | '''CAM PYR:''' -0.148 -1.286 0 | ||
| + | |||
| + | '''Missions''' | ||
| + | * [[Ghost Widow#Go through the portal 2|Go through the portal]] (and corresponding ''Time After Time'' mission from any villain patron contact) | ||
| + | * [[Ghost Widow#Enter Destiny Portal and defeat Lord Recluse|Enter Destiny Portal and defeat Lord Recluse]] (and corresponding ''Time After Time'' mission from any villain patron contact) | ||
| + | |||
| + | '''Notes''' | ||
| + | * The Council MegaMech lies just outside the playable boundaries of the map. | ||
|- | |- | ||
|} | |} | ||
{{clr}} | {{clr}} | ||
| − | ===Atlas Park Fashion Show=== | + | === Atlas Park Fashion Show === |
{| border="0" cellspacing="0" cellpadding="5" align="left" | {| border="0" cellspacing="0" cellpadding="5" align="left" | ||
|-valign="top" | |-valign="top" | ||
| − | | [[ | + | | [[File:AtlasFashionShow1.jpg|thumb|250px|center|{{center|Fashion show at Atlas Park}}]] |
| '''Demo Map Name:''' ''MAPS/MISSIONS/OUTDOOR_MISSIONS/OUTDOOR_FLASHBACK/IOM_FB_ATLAS_PARK_SAM/IOM_FB_ATLAS_PARK_SAM.TXT'' | | '''Demo Map Name:''' ''MAPS/MISSIONS/OUTDOOR_MISSIONS/OUTDOOR_FLASHBACK/IOM_FB_ATLAS_PARK_SAM/IOM_FB_ATLAS_PARK_SAM.TXT'' | ||
| Line 148: | Line 198: | ||
'''Missions''' | '''Missions''' | ||
| − | * [[Twilight's Son Task Force#Go to the Atlas Park fashion show and keep Candy Lebeaux from being abducted. | Go to the Atlas Park fashion show and keep Candy Lebeaux from being abducted.]] | + | * [[Twilight's Son Task Force#Go to the Atlas Park fashion show and keep Candy Lebeaux from being abducted.|Go to the Atlas Park fashion show and keep Candy Lebeaux from being abducted.]] |
'''Notes''' | '''Notes''' | ||
| Line 156: | Line 206: | ||
{{clr}} | {{clr}} | ||
| − | ===Atlas Park Meteorite=== | + | === Atlas Park Meteorite === |
{| border="0" cellspacing="0" cellpadding="5" align="left" | {| border="0" cellspacing="0" cellpadding="5" align="left" | ||
|-valign="top" | |-valign="top" | ||
| − | | [[ | + | | [[File:AtlasShivan01.jpg|thumb|250px|center|{{center|Meteor Strike Aftermath in Atlas}}]] |
| '''Demo Map Name:''' ''MAPS/MISSIONS/OUTDOOR_MISSIONS/OUTDOOR_FLASHBACK/IOM_FB_ATLAS_PARK_WTO/IOM_FB_ATLAS_PARK_WTO.TXT'' | | '''Demo Map Name:''' ''MAPS/MISSIONS/OUTDOOR_MISSIONS/OUTDOOR_FLASHBACK/IOM_FB_ATLAS_PARK_WTO/IOM_FB_ATLAS_PARK_WTO.TXT'' | ||
| Line 168: | Line 218: | ||
'''Missions''' | '''Missions''' | ||
| − | * [[Pilgrim#Ouroboros Initiation Part Five | Ouroboros Initiation Part Five]] | + | * [[Pilgrim#Ouroboros Initiation Part Five|Ouroboros Initiation Part Five]] |
|- | |- | ||
|} | |} | ||
{{clr}} | {{clr}} | ||
| − | ===Atlas Park Statesman's Speech=== | + | === Atlas Park Statesman's Speech === |
{| border="0" cellspacing="0" cellpadding="5" align="left" | {| border="0" cellspacing="0" cellpadding="5" align="left" | ||
|-valign="top" | |-valign="top" | ||
| − | | [[ | + | | [[File:Badge question mark.png]] |
| '''Demo Map Name:''' ''MAPS/MISSIONS/OUTDOOR_MISSIONS/V_OUTDOOR_ATLAS/VEAT_SL9_DESSLOCK/STATESMANSSPEACH.TXT'' | | '''Demo Map Name:''' ''MAPS/MISSIONS/OUTDOOR_MISSIONS/V_OUTDOOR_ATLAS/VEAT_SL9_DESSLOCK/STATESMANSSPEACH.TXT'' | ||
| Line 190: | Line 240: | ||
{{clr}} | {{clr}} | ||
| − | ===Boomtown Reconstruction=== | + | === Boomtown Reconstruction === |
{| border="0" cellspacing="0" cellpadding="5" align="left" | {| border="0" cellspacing="0" cellpadding="5" align="left" | ||
|-valign="top" | |-valign="top" | ||
| − | | [[ | + | | [[File:BoomtownRebuilt1.jpg|thumb|250px|center|{{center|Boomtown Rebuilding}}]] |
| '''Demo Map Name:''' ''MAPS/MISSIONS/OUTDOOR_MISSIONS/V_OUTDOOR_BOOMTOWN/V_OUTDOOR_BOOMTOWN_RECONSTRUCTION.TXT'' | | '''Demo Map Name:''' ''MAPS/MISSIONS/OUTDOOR_MISSIONS/V_OUTDOOR_BOOMTOWN/V_OUTDOOR_BOOMTOWN_RECONSTRUCTION.TXT'' | ||
| Line 202: | Line 252: | ||
'''Missions''' | '''Missions''' | ||
| − | * [[Operative Wellman#Destroy Building Supplies | Destroy Building Supplies]] | + | * [[Operative Wellman#Destroy Building Supplies|Destroy Building Supplies]] |
|- | |- | ||
|} | |} | ||
{{clr}} | {{clr}} | ||
| − | ===Burning Forest=== | + | === Burning Forest === |
{| border="0" cellspacing="0" cellpadding="5" align="left" | {| border="0" cellspacing="0" cellpadding="5" align="left" | ||
|-valign="top" | |-valign="top" | ||
| − | | [[ | + | | [[File:ForestFire01.jpg|thumb|250px|center|{{center|Devastated Woodland}}]] |
| '''Demo Map Name:''' ''MAPS/MISSIONS/OUTDOOR_MISSIONS/OUTDOOR_UNIQUE/OUTDOOR_UNIQUE_FOREST_02/OUTDOOR_UNIQUE_FOREST_02C_RIKTI.TXT'' | | '''Demo Map Name:''' ''MAPS/MISSIONS/OUTDOOR_MISSIONS/OUTDOOR_UNIQUE/OUTDOOR_UNIQUE_FOREST_02/OUTDOOR_UNIQUE_FOREST_02C_RIKTI.TXT'' | ||
| Line 219: | Line 269: | ||
'''Missions''' | '''Missions''' | ||
| − | * [[Levantera#Take out Rikti assault group | Take out Rikti assault group]] | + | * [[Levantera#Take out Rikti assault group|Take out Rikti assault group]] |
|- | |- | ||
|} | |} | ||
{{clr}} | {{clr}} | ||
| − | ===Carnie Warehouse=== | + | === Carnie Warehouse === |
{| border="0" cellspacing="0" cellpadding="5" align="left" | {| border="0" cellspacing="0" cellpadding="5" align="left" | ||
|-valign="top" | |-valign="top" | ||
| − | | [[ | + | | [[File:CarnieWarehouse01.jpg|thumb|250px|center|{{center|Carnival of Shadows Rave}}]] |
| '''Demo Map Name:''' ''MAPS/MISSIONS/UNIQUE/DOORMISSIONS/CARNIVAL_WAREHOUSE_RAVE.TXT'' | | '''Demo Map Name:''' ''MAPS/MISSIONS/UNIQUE/DOORMISSIONS/CARNIVAL_WAREHOUSE_RAVE.TXT'' | ||
| Line 236: | Line 286: | ||
'''Missions''' | '''Missions''' | ||
| − | * [[Ghost Widow#Crash Carnival revel to steal masks | Crash Carnival revel to steal masks]] | + | * [[Ghost Widow#Crash Carnival revel to steal masks|Crash Carnival revel to steal masks]] |
|- | |- | ||
|} | |} | ||
{{clr}} | {{clr}} | ||
| − | ===Cemetery (Grand Mausoleum)=== | + | === Cemetery (Grand Mausoleum) === |
{| border="0" cellspacing="0" cellpadding="5" align="left" | {| border="0" cellspacing="0" cellpadding="5" align="left" | ||
|-valign="top" | |-valign="top" | ||
| − | | [[ | + | | [[File:Mausoleum01.jpg|thumb|250px|center|{{center|Sunken Mausoleum & Cemetery}}]] |
| '''Demo Map Name:''' ''MAPS/MISSIONS/OUTDOOR_MISSIONS/OUTDOOR_GRAVEYARD/OUTDOOR_GRAVEYARD_01/OUTDOOR_GRAVEYARD_01A.TXT'' | | '''Demo Map Name:''' ''MAPS/MISSIONS/OUTDOOR_MISSIONS/OUTDOOR_GRAVEYARD/OUTDOOR_GRAVEYARD_01/OUTDOOR_GRAVEYARD_01A.TXT'' | ||
| Line 253: | Line 303: | ||
'''Missions''' | '''Missions''' | ||
| − | * [[Technician Naylor#Stop Dr. Aeon's unauthorized dimension hopping | Stop Dr. Aeon's unauthorized dimension hopping]] | + | * [[Technician Naylor#Stop Dr. Aeon's unauthorized dimension hopping|Stop Dr. Aeon's unauthorized dimension hopping]] |
|- | |- | ||
|} | |} | ||
{{clr}} | {{clr}} | ||
| − | ===Chum Bucket=== | + | === Chum Bucket === |
{| border="0" cellspacing="0" cellpadding="5" align="left" | {| border="0" cellspacing="0" cellpadding="5" align="left" | ||
|-valign="top" | |-valign="top" | ||
| − | | [[ | + | | [[File:ChumBucket1.jpg|thumb|250px|center|{{center|The Chum Bucket}}]] |
| '''Demo Map Name:''' ''MAPS/MISSIONS/UNIQUE/V_SHARKHEAD/CHUM_BUCKET.TXT'' | | '''Demo Map Name:''' ''MAPS/MISSIONS/UNIQUE/V_SHARKHEAD/CHUM_BUCKET.TXT'' | ||
| Line 270: | Line 320: | ||
'''Missions''' | '''Missions''' | ||
| − | * [[Rogue Isle Protector#Chum Bucket sees brisk business | Chum Bucket sees brisk business]] (Sharkhead Isle Newspaper mission) | + | * [[Rogue Isle Protector#Chum Bucket sees brisk business|Chum Bucket sees brisk business]] (Sharkhead Isle Newspaper mission) |
|- | |- | ||
|} | |} | ||
{{clr}} | {{clr}} | ||
| − | ===Clocktower Courtyard=== | + | === Clocktower Courtyard === |
{| border="0" cellspacing="0" cellpadding="5" align="left" | {| border="0" cellspacing="0" cellpadding="5" align="left" | ||
|-valign="top" | |-valign="top" | ||
| − | | [[ | + | | [[File:Clocktower01.jpg|thumb|250px|center|{{center|Clocktower Courtyard}}]] |
| '''Demo Map Name:''' ''MAPS/MISSIONS/OUTDOOR_MISSIONS/V_OUTDOOR_MERCY/INST_DL_CLOCKTOWER/INST_DL_CLOCKTOWER.TXT'' | | '''Demo Map Name:''' ''MAPS/MISSIONS/OUTDOOR_MISSIONS/V_OUTDOOR_MERCY/INST_DL_CLOCKTOWER/INST_DL_CLOCKTOWER.TXT'' | ||
| Line 287: | Line 337: | ||
'''Missions''' | '''Missions''' | ||
| − | * [[Kalinda#Mop up the stragglers | Mop up the stragglers]] | + | * [[Kalinda#Mop up the stragglers|Mop up the stragglers]] |
|- | |- | ||
|} | |} | ||
{{clr}} | {{clr}} | ||
| − | ===Council Warehouse=== | + | === Council Warehouse === |
{| border="0" cellspacing="0" cellpadding="5" align="left" | {| border="0" cellspacing="0" cellpadding="5" align="left" | ||
|-valign="top" | |-valign="top" | ||
| − | | [[ | + | | [[File:CouncilWarehouse01.jpg|thumb|250px|center|{{center|Council Warehouse}}]] |
| '''Demo Map Name:''' ''MAPS/MISSIONS/UNIQUE/DOORMISSIONS/5TH_COLUMN_WAREHOUSE.TXT'' | | '''Demo Map Name:''' ''MAPS/MISSIONS/UNIQUE/DOORMISSIONS/5TH_COLUMN_WAREHOUSE.TXT'' | ||
| Line 304: | Line 354: | ||
'''Missions''' | '''Missions''' | ||
| − | * [[Derek Amberson#Speak to Rachel Torres | Speak to Rachel Torres]] (third part - ''"Defeat all Council soldiers"'') | + | * [[Derek Amberson#Speak to Rachel Torres|Speak to Rachel Torres]] (third part - ''"Defeat all Council soldiers"'') |
| − | * [[Susan Davies#Speak to Laurence Mansfield | Speak to Laurence Mansfield]] (third part - ''"Defeat all Council soldiers"'') | + | * [[Susan Davies#Speak to Laurence Mansfield|Speak to Laurence Mansfield]] (third part - ''"Defeat all Council soldiers"'') |
|- | |- | ||
|} | |} | ||
{{clr}} | {{clr}} | ||
| − | ===Crey Cloning Lab=== | + | === Crey Cloning Lab === |
{| border="0" cellspacing="0" cellpadding="5" align="left" | {| border="0" cellspacing="0" cellpadding="5" align="left" | ||
|-valign="top" | |-valign="top" | ||
| − | | [[ | + | | [[File:RevenantHeroLab01.jpg|thumb|250px|center|{{center|Protector Cloning Lab}}]] |
| '''Demo Map Name:''' ''MAPS/MISSIONS/UNIQUE/ARTIFIED/CREY_HERO_LAB.TXT'' | | '''Demo Map Name:''' ''MAPS/MISSIONS/UNIQUE/ARTIFIED/CREY_HERO_LAB.TXT'' | ||
| Line 322: | Line 372: | ||
'''Missions''' | '''Missions''' | ||
| − | * [[Gordon Stacy#Attack the Crey facility and stop the Revenant Hero Project | Attack the Crey facility and stop the Revenant Hero Project]] | + | * [[Gordon Stacy#Attack the Crey facility and stop the Revenant Hero Project|Attack the Crey facility and stop the Revenant Hero Project]] |
|- | |- | ||
|} | |} | ||
{{clr}} | {{clr}} | ||
| − | === | + | === Crypt Entrance === |
{| border="0" cellspacing="0" cellpadding="5" align="left" | {| border="0" cellspacing="0" cellpadding="5" align="left" | ||
|-valign="top" | |-valign="top" | ||
| − | | [[ | + | | [[File:CryptEntrance01.jpg|thumb|250px|center|{{center|Crypt Entrance}}]] |
| + | | '''Demo Map Name:''' ''maps/Missions/V_Mos_to_smoothcaves/V_Mos_to_Smoothcaves_30/V_Mos_to_Smoothcaves_30_layout_05.txt'' | ||
| + | |||
| + | '''CAM POS:''' -23.730 25.373 39.152 | ||
| + | |||
| + | '''CAM PYR:''' 0.304 3.131 -0 | ||
| + | |||
| + | '''Missions''' | ||
| + | * [[Captain Mako#Interrogate Circle leaders|Interrogate Circle leaders]] | ||
| + | |- | ||
| + | |} | ||
| + | {{clr}} | ||
| + | |||
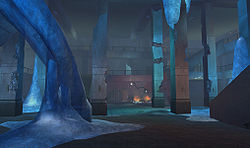
| + | === Crystal Caves === | ||
| + | |||
| + | {| border="0" cellspacing="0" cellpadding="5" align="left" | ||
| + | |-valign="top" | ||
| + | | [[File:CrystalCaves01.jpg|thumb|250px|center|{{center|Crystal Caves}}]] | ||
| '''Demo Map Name:''' ''MAPS/MISSIONS/UNIQUE/ARTIFIED/V_CRYSTAL_CAVES/CRYSTAL_CAVES.TXT'' | | '''Demo Map Name:''' ''MAPS/MISSIONS/UNIQUE/ARTIFIED/V_CRYSTAL_CAVES/CRYSTAL_CAVES.TXT'' | ||
| Line 339: | Line 406: | ||
'''Missions''' | '''Missions''' | ||
| − | * [[Ice Mistral Strike Force#Defeat Archus | Defeat Archus]] | + | * [[Ice Mistral Strike Force#Defeat Archus|Defeat Archus]] |
|- | |- | ||
|} | |} | ||
{{clr}} | {{clr}} | ||
| − | ===Demon-Infested Tech Lab=== | + | === Demon-Infested Tech Lab === |
{| border="0" cellspacing="0" cellpadding="5" align="left" | {| border="0" cellspacing="0" cellpadding="5" align="left" | ||
|-valign="top" | |-valign="top" | ||
| − | | [[ | + | | [[File:TechDemon01.jpg|thumb|250px|center|{{center|Demon-Ravaged Crey Lab}}]] |
| '''Demo Map Name:''' ''MAPS/MISSIONS/UNIQUE/V_GRANDVILLE/SMOKEY_LAB.TXT'' | | '''Demo Map Name:''' ''MAPS/MISSIONS/UNIQUE/V_GRANDVILLE/SMOKEY_LAB.TXT'' | ||
| Line 356: | Line 423: | ||
'''Missions''' | '''Missions''' | ||
| − | * [[Tavish Bell#Take out the Archdemon | Take out the Archdemon]] | + | * [[Tavish Bell#Take out the Archdemon|Take out the Archdemon]] |
|- | |- | ||
|} | |} | ||
{{clr}} | {{clr}} | ||
| − | ===Devouring Earth Office=== | + | === Devouring Earth Office === |
{| border="0" cellspacing="0" cellpadding="5" align="left" | {| border="0" cellspacing="0" cellpadding="5" align="left" | ||
|-valign="top" | |-valign="top" | ||
| − | | [[ | + | | [[File:DEOffice01.jpg|thumb|250px|center|{{center|Devouring Earth-Infested Office}}]] |
| '''Demo Map Name:''' ''MAPS/MISSIONS/UNIQUE/ARTIFIED/DEVOURING_EARTH_RAMPAGE.TXT'' | | '''Demo Map Name:''' ''MAPS/MISSIONS/UNIQUE/ARTIFIED/DEVOURING_EARTH_RAMPAGE.TXT'' | ||
| Line 373: | Line 440: | ||
'''Missions''' | '''Missions''' | ||
| − | * [[Ginger Yates#Medicate the victims of the Devouring Earth's gassing attack | Medicate the victims of the Devouring Earth's gassing attack]] | + | * [[Ginger Yates#Medicate the victims of the Devouring Earth's gassing attack|Medicate the victims of the Devouring Earth's gassing attack]] |
|- | |- | ||
|} | |} | ||
{{clr}} | {{clr}} | ||
| − | ===Eden Mission Map=== | + | === Eden Mission Map === |
{| border="0" cellspacing="0" cellpadding="5" align="left" | {| border="0" cellspacing="0" cellpadding="5" align="left" | ||
|-valign="top" | |-valign="top" | ||
| − | | [[ | + | | [[File:EdenMissionMap01.jpg|thumb|250px|center|{{center|Arachnos Invades Eden}}]] |
| '''Demo Map Name:''' ''MAPS/MISSIONS/OUTDOOR_MISSIONS/OUTDOOR_EDEN/OUTDOOR_EDEN.TXT'' | | '''Demo Map Name:''' ''MAPS/MISSIONS/OUTDOOR_MISSIONS/OUTDOOR_EDEN/OUTDOOR_EDEN.TXT'' | ||
| Line 390: | Line 457: | ||
'''Missions''' | '''Missions''' | ||
| − | * [[Vernon von Grun#Help Vernon von Grun implement his mad plan to destroy Paragon City | Help Vernon von Grun implement his mad plan to destroy Paragon City]] | + | * [[Vernon von Grun#Help Vernon von Grun implement his mad plan to destroy Paragon City|Help Vernon von Grun implement his mad plan to destroy Paragon City]] |
| − | * [[Vernon von Grun#Place Vernon's growth bombs in Eden | Place Vernon's growth bombs in Eden]] | + | * [[Vernon von Grun#Place Vernon's growth bombs in Eden|Place Vernon's growth bombs in Eden]] |
| − | * [[Vernon von Grun#Get Vernon's schemes back on track | Get Vernon's schemes back on track]] | + | * [[Vernon von Grun#Get Vernon's schemes back on track|Get Vernon's schemes back on track]] |
| − | * [[Vernon von Grun#Get Vernon to pull himself together and get back to doing evil! | Get Vernon to pull himself together and get back to doing evil!]] | + | * [[Vernon von Grun#Get Vernon to pull himself together and get back to doing evil!|Get Vernon to pull himself together and get back to doing evil!]] |
| − | * [[Vernon von Grun#Defeat Zenflower and free the Devouring Earth from her control | Defeat Zenflower and free the Devouring Earth from her control]] | + | * [[Vernon von Grun#Defeat Zenflower and free the Devouring Earth from her control|Defeat Zenflower and free the Devouring Earth from her control]] |
|- | |- | ||
|} | |} | ||
{{clr}} | {{clr}} | ||
| − | ===Faultline Dam=== | + | === Faultline Dam === |
{| border="0" cellspacing="0" cellpadding="5" align="left" | {| border="0" cellspacing="0" cellpadding="5" align="left" | ||
|-valign="top" | |-valign="top" | ||
| − | | [[ | + | | [[File:Dam1.jpg|thumb|250px|center|{{center|Faultline Dam Interior}}]] |
| '''Demo Map Name:''' ''MAPS/MISSIONS/UNIQUE/FAULTLINE/DAMLIES/DAMLIES.TXT'' | | '''Demo Map Name:''' ''MAPS/MISSIONS/UNIQUE/FAULTLINE/DAMLIES/DAMLIES.TXT'' | ||
| Line 411: | Line 478: | ||
'''Missions''' | '''Missions''' | ||
| − | * [[Agent G#Draw out Nocturne | Draw out Nocturne]] | + | * [[Agent G#Draw out Nocturne|Draw out Nocturne]] |
| − | * [[Serpent Drummer#Fight back Rikti attacks | Fight back Rikti attacks]] (fourth part - ''"Clear Rikti from Dam"'') | + | * [[Serpent Drummer#Fight back Rikti attacks|Fight back Rikti attacks]] (fourth part - ''"Clear Rikti from Dam"'') |
|- | |- | ||
|} | |} | ||
{{clr}} | {{clr}} | ||
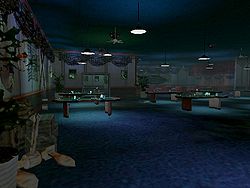
| − | ===Freaklympics=== | + | === Freaklympics === |
{| border="0" cellspacing="0" cellpadding="5" align="left" | {| border="0" cellspacing="0" cellpadding="5" align="left" | ||
|-valign="top" | |-valign="top" | ||
| − | | [[ | + | | [[File:Freaklympics1.jpg|thumb|250px|center|{{center|Freaklympics Awards Ceremony}}]] |
| '''Demo Map Name:''' ''MAPS/MISSIONS/UNIQUE/ARTIFIED/FREAK_OLYMPIC_AWARDS.TXT'' | | '''Demo Map Name:''' ''MAPS/MISSIONS/UNIQUE/ARTIFIED/FREAK_OLYMPIC_AWARDS.TXT'' | ||
| Line 429: | Line 496: | ||
'''Missions''' | '''Missions''' | ||
| − | * [[Marvin Weintraub#Crash the Freaklympics awards ceremony and arrest Mistah Static | Crash the Freaklympics awards ceremony and arrest Mistah Static]] from level 25-29 Technology origin contacts | + | * [[Marvin Weintraub#Crash the Freaklympics awards ceremony and arrest Mistah Static|Crash the Freaklympics awards ceremony and arrest Mistah Static]] from level 25-29 Technology origin contacts |
|- | |- | ||
|} | |} | ||
{{clr}} | {{clr}} | ||
| − | ===Freakshow Office=== | + | === Freakshow Office === |
{| border="0" cellspacing="0" cellpadding="5" align="left" | {| border="0" cellspacing="0" cellpadding="5" align="left" | ||
|-valign="top" | |-valign="top" | ||
| − | | [[ | + | | [[File:FreakshowHideout1.jpg|thumb|250px|center|{{center|Freakshow Abandoned Office}}]] |
| '''Demo Map Name:''' ''MAPS/MISSIONS/UNIQUE/DOORMISSIONS/FREAKSHOW_ABANDONED_OFFICE.TXT'' | | '''Demo Map Name:''' ''MAPS/MISSIONS/UNIQUE/DOORMISSIONS/FREAKSHOW_ABANDONED_OFFICE.TXT'' | ||
| Line 446: | Line 513: | ||
'''Missions''' | '''Missions''' | ||
| − | * [[Wilma Peterson#Retrieve the stolen weapons from the Freakshow | Retrieve the stolen weapons from the Freakshow]] from level 20-24 Technology origin contacts | + | * [[Wilma Peterson#Retrieve the stolen weapons from the Freakshow|Retrieve the stolen weapons from the Freakshow]] from level 20-24 Technology origin contacts |
|- | |- | ||
|} | |} | ||
{{clr}} | {{clr}} | ||
| − | ===Freakshow Warehouse=== | + | === Freakshow Warehouse === |
{| border="0" cellspacing="0" cellpadding="5" align="left" | {| border="0" cellspacing="0" cellpadding="5" align="left" | ||
|-valign="top" | |-valign="top" | ||
| − | | [[ | + | | [[File:FreakshowWarehouse01.jpg|thumb|250px|center|{{center|Freakshow Abandoned Warehouse}}]] |
| '''Demo Map Name:''' ''MAPS/MISSIONS/UNIQUE/DOORMISSIONS/FREAKSHOW_ABANDONED_WAREHOUSE.TXT'' | | '''Demo Map Name:''' ''MAPS/MISSIONS/UNIQUE/DOORMISSIONS/FREAKSHOW_ABANDONED_WAREHOUSE.TXT'' | ||
| Line 463: | Line 530: | ||
'''Missions''' | '''Missions''' | ||
| − | * [[Neal Kendrick#Find out who's supplying the Freakshow with the new weapons | Find out who's supplying the Freakshow with the new weapons]] from level 30-34 Technology origin contacts | + | * [[Neal Kendrick#Find out who's supplying the Freakshow with the new weapons|Find out who's supplying the Freakshow with the new weapons]] from level 30-34 Technology origin contacts |
| − | * [[Diviner Maros#Take the fight to 'Metal Shift' | Take the fight to 'Metal Shift']] | + | * [[Diviner Maros#Take the fight to 'Metal Shift'|Take the fight to 'Metal Shift']] |
| − | * [[Diviner Maros#Find the location of Calystix | Find the location of Calystix]] | + | * [[Diviner Maros#Find the location of Calystix|Find the location of Calystix]] |
|- | |- | ||
|} | |} | ||
{{clr}} | {{clr}} | ||
| − | ===Frostfire's Hideout=== | + | === Frostfire's Hideout === |
{| border="0" cellspacing="0" cellpadding="5" align="left" | {| border="0" cellspacing="0" cellpadding="5" align="left" | ||
|-valign="top" | |-valign="top" | ||
| − | | [[ | + | | [[File:FrostfireHideout1.jpg|thumb|250px|center|{{center|Frostfire's Lair}}]] |
| '''Demo Map Name:''' ''MAPS/MISSIONS/UNIQUE/DOORMISSIONS/OUTCASTS_LAIR.TXT'' | | '''Demo Map Name:''' ''MAPS/MISSIONS/UNIQUE/DOORMISSIONS/OUTCASTS_LAIR.TXT'' | ||
| Line 482: | Line 549: | ||
'''Missions''' | '''Missions''' | ||
| − | * [[Flux#Take Out Frostfire | Take Out Frostfire]] | + | * [[Flux#Take Out Frostfire|Take Out Frostfire]] |
|- | |- | ||
|} | |} | ||
{{clr}} | {{clr}} | ||
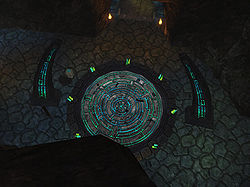
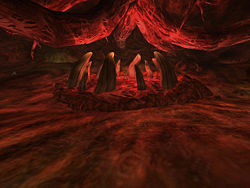
| − | === | + | === Ghost Widow Summoning Circle === |
{| border="0" cellspacing="0" cellpadding="5" align="left" | {| border="0" cellspacing="0" cellpadding="5" align="left" | ||
|-valign="top" | |-valign="top" | ||
| − | | [[ | + | | [[File:GWSummoningCircle01.jpg|thumb|250px|center|{{center|The Summoning Circle}}]] |
| + | | '''Demo Map Name:''' ''MAPS/MISSIONS/UNIQUE/V_GRANDVILLE/COT_GHOSTWIDOW_SUMMONING_CIRCLE.TXT'' | ||
| + | |||
| + | '''CAM POS:''' 261.728 93.901 235.543 | ||
| + | |||
| + | '''CAM PYR:''' 1.150 3.004 -0 | ||
| + | |||
| + | '''Missions''' | ||
| + | * [[Ghost Widow#Perform the ceremony|Perform the ceremony]] | ||
| + | |||
| + | '''Notes''' | ||
| + | * A fairly standard Oranbega map, apart from the summoning circle itself. | ||
| + | |- | ||
| + | |} | ||
| + | {{clr}} | ||
| + | |||
| + | === Great Ceremony === | ||
| + | |||
| + | {| border="0" cellspacing="0" cellpadding="5" align="left" | ||
| + | |-valign="top" | ||
| + | | [[File:GreatCeremony01.jpg|thumb|250px|center|{{center|The Great Ceremony}}]] | ||
| '''Demo Map Name:''' ''MAPS/MISSIONS/UNIQUE/V_GRANDVILLE/V_GREAT_CEREMONY.TXT'' | | '''Demo Map Name:''' ''MAPS/MISSIONS/UNIQUE/V_GRANDVILLE/V_GREAT_CEREMONY.TXT'' | ||
| Line 499: | Line 586: | ||
'''Missions''' | '''Missions''' | ||
| − | * [[Mage-Killer Zuhkara#Stop the ceremony | Stop the ceremony]] | + | * [[Mage-Killer Zuhkara#Stop the ceremony|Stop the ceremony]] |
'''Notes''' | '''Notes''' | ||
| Line 508: | Line 595: | ||
{{clr}} | {{clr}} | ||
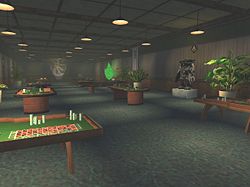
| − | ===Hook and Anchor=== | + | === Hook and Anchor === |
{| border="0" cellspacing="0" cellpadding="5" align="left" | {| border="0" cellspacing="0" cellpadding="5" align="left" | ||
|-valign="top" | |-valign="top" | ||
| − | | [[ | + | | [[File:Hook_and_Anchor.jpg|thumb|250px|center|{{center|Hook and Anchor Casino}}]] |
| '''Demo Map Name:''' ''MAPS/MISSIONS/UNIQUE/V_PORTOAKS/CASINO_HOOK_AND_ANCHOR.TXT'' | | '''Demo Map Name:''' ''MAPS/MISSIONS/UNIQUE/V_PORTOAKS/CASINO_HOOK_AND_ANCHOR.TXT'' | ||
| Line 520: | Line 607: | ||
'''Missions''' | '''Missions''' | ||
| − | * [[Billie Heck#Capture Emil Marcone | Capture Emil Marcone]] | + | * [[Billie Heck#Capture Emil Marcone|Capture Emil Marcone]] |
|- | |- | ||
|} | |} | ||
{{clr}} | {{clr}} | ||
| − | ===Johnny Sonata's Hell=== | + | === Johnny Sonata's Hell === |
{| border="0" cellspacing="0" cellpadding="5" align="left" | {| border="0" cellspacing="0" cellpadding="5" align="left" | ||
|-valign="top" | |-valign="top" | ||
| − | | [[ | + | | [[File:Johnnypersonalhell.jpg|thumb|250px|center|{{center|Johnny Sonata's Hell}}]] |
| '''Demo Map Name:''' ''MAPS/MISSIONS/UNIQUE/V_JOHNNYS_HELL/V_JOHNNYS_HELL.TXT'' | | '''Demo Map Name:''' ''MAPS/MISSIONS/UNIQUE/V_JOHNNYS_HELL/V_JOHNNYS_HELL.TXT'' | ||
| Line 537: | Line 624: | ||
'''Missions''' | '''Missions''' | ||
| − | * [[Johnny Sonata#Get | + | * [[Johnny Sonata#Get back Johnny's soul|Get back Johnny's soul]] |
|- | |- | ||
|} | |} | ||
{{clr}} | {{clr}} | ||
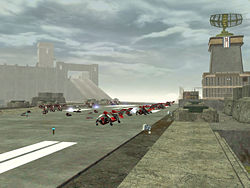
| − | ===Longbow Island Base=== | + | === Longbow Island Base === |
{| border="0" cellspacing="0" cellpadding="5" align="left" | {| border="0" cellspacing="0" cellpadding="5" align="left" | ||
|-valign="top" | |-valign="top" | ||
| − | | [[ | + | | [[File:LongbowBase01.jpg|thumb|250px|center|{{center|Longbow Base Landing Strip}}]] |
| '''Demo Map Name:''' ''MAPS/MISSIONS/OUTDOOR_MISSIONS/V_OUTDOOR_LONGBOW/V_OUTDOOR_LONGBOW.TXT'' | | '''Demo Map Name:''' ''MAPS/MISSIONS/OUTDOOR_MISSIONS/V_OUTDOOR_LONGBOW/V_OUTDOOR_LONGBOW.TXT'' | ||
| Line 554: | Line 641: | ||
'''Missions''' | '''Missions''' | ||
| − | * [[Vernon von Grun#Steal Will of the Earth from heavily defended Longbow island base. | Steal Will of the Earth from heavily defended Longbow island base.]] | + | * [[Vernon von Grun#Steal Will of the Earth from heavily defended Longbow island base.|Steal Will of the Earth from heavily defended Longbow island base.]] |
|- | |- | ||
|} | |} | ||
{{clr}} | {{clr}} | ||
| − | ===Longbow Officers' Club=== | + | === Longbow Officers' Club === |
{| border="0" cellspacing="0" cellpadding="5" align="left" | {| border="0" cellspacing="0" cellpadding="5" align="left" | ||
|-valign="top" | |-valign="top" | ||
| − | | [[ | + | | [[File:OfficersClub1.jpg|thumb|250px|center|{{center|Longbow Officers' Club}}]] |
| '''Demo Map Name:''' ''MAPS/MISSIONS/UNIQUE/V_NERVA_ISLES/OFFICERS_CLUB.TXT'' | | '''Demo Map Name:''' ''MAPS/MISSIONS/UNIQUE/V_NERVA_ISLES/OFFICERS_CLUB.TXT'' | ||
| Line 571: | Line 658: | ||
'''Missions''' | '''Missions''' | ||
| − | * [[Rogue Isle Protector#Big party at Longbow's Officer Club! | Big party at Longbow's Officer Club!]] (Nerva Archipelago Newspaper mission) | + | * [[Rogue Isle Protector#Big party at Longbow's Officer Club!|Big party at Longbow's Officer Club!]] (Nerva Archipelago Newspaper mission) |
|- | |- | ||
|} | |} | ||
{{clr}} | {{clr}} | ||
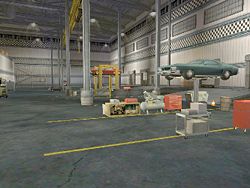
| − | ===Lou's Garage=== | + | === Lou's Garage === |
{| border="0" cellspacing="0" cellpadding="5" align="left" | {| border="0" cellspacing="0" cellpadding="5" align="left" | ||
|-valign="top" | |-valign="top" | ||
| − | | [[ | + | | [[File:LouShop1.jpg|thumb|250px|center|{{center|Lou's Garage}}]] |
| '''Demo Map Name:''' ''MAPS/MISSIONS/UNIQUE/DOORMISSIONS/LOUS_GARAGE_60.TXT'' | | '''Demo Map Name:''' ''MAPS/MISSIONS/UNIQUE/DOORMISSIONS/LOUS_GARAGE_60.TXT'' | ||
| Line 588: | Line 675: | ||
'''Missions''' | '''Missions''' | ||
| − | * [[ | + | * [[Athena Currie#Find a clue that will lead you to Lou's missing wife and daughter|Find a clue that will lead you to Lou's missing wife and daughter]] from level 10-14 Technology origin contacts |
|- | |- | ||
|} | |} | ||
{{clr}} | {{clr}} | ||
| − | ===Lucky Six=== | + | === Lucky Six === |
{| border="0" cellspacing="0" cellpadding="5" align="left" | {| border="0" cellspacing="0" cellpadding="5" align="left" | ||
|-valign="top" | |-valign="top" | ||
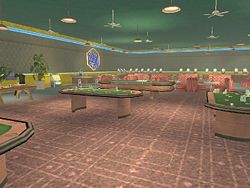
| − | | [[ | + | | [[File:LuckySix1.jpg|thumb|250px|center|{{center|Lucky Six Casino}}]] |
| '''Demo Map Name:''' ''MAPS/MISSIONS/UNIQUE/V_STMARTIAL/LUCKY_SIX.TXT'' | | '''Demo Map Name:''' ''MAPS/MISSIONS/UNIQUE/V_STMARTIAL/LUCKY_SIX.TXT'' | ||
| Line 605: | Line 692: | ||
'''Missions''' | '''Missions''' | ||
| − | * [[Basse Croupier#Defeat Tsoo Racketeers | Defeat Tsoo Racketeers]] | + | * [[Basse Croupier#Defeat Tsoo Racketeers|Defeat Tsoo Racketeers]] |
| − | * [[Rogue Isle Protector#Lucky Six, small casino but big profit! | Lucky Six, small casino but big profit!]] (St. Martial Newspaper mission) | + | * [[Rogue Isle Protector#Lucky Six, small casino but big profit!|Lucky Six, small casino but big profit!]] (St. Martial Newspaper mission) |
|- | |- | ||
|} | |} | ||
{{clr}} | {{clr}} | ||
| − | ===Misdirected Portal=== | + | === Misdirected Portal === |
{| border="0" cellspacing="0" cellpadding="5" align="left" | {| border="0" cellspacing="0" cellpadding="5" align="left" | ||
|-valign="top" | |-valign="top" | ||
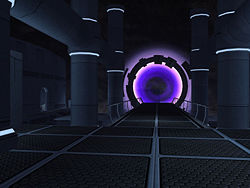
| − | | [[ | + | | [[File:MisdirectedPortal01.jpg|thumb|250px|center|{{center|Dr. Aeon's Lab, 15 years in the future}}]] |
| '''Demo Map Name:''' ''MAPS/MISSIONS/UNIQUE/V_GRANDVILLE/MISDIRECTEDPORTAL.TXT'' | | '''Demo Map Name:''' ''MAPS/MISSIONS/UNIQUE/V_GRANDVILLE/MISDIRECTEDPORTAL.TXT'' | ||
| Line 623: | Line 710: | ||
'''Missions''' | '''Missions''' | ||
| − | * [[Ghost Widow#Go through the portal|Go through the portal]] | + | * [[Ghost Widow#Go through the portal|Go through the portal]] (and corresponding ''Time After Time'' mission from any villain patron contact) |
|- | |- | ||
|} | |} | ||
{{clr}} | {{clr}} | ||
| − | === | + | === Misdirected Portal, Window View === |
{| border="0" cellspacing="0" cellpadding="5" align="left" | {| border="0" cellspacing="0" cellpadding="5" align="left" | ||
|-valign="top" | |-valign="top" | ||
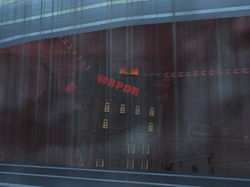
| − | | [[ | + | | [[File:FutureCapAuDiable01.jpg|thumb|250px|center|{{center|Cap au Diable in the future}}]] |
| + | | '''Demo Map Name:''' ''MAPS/MISSIONS/UNIQUE/V_GRANDVILLE/MISDIRECTEDPORTAL.TXT'' | ||
| + | |||
| + | '''CAM POS:''' -682.099 194.955 -1709.949 | ||
| + | |||
| + | '''CAM PYR:''' -0.124 2.851 -0 | ||
| + | |||
| + | '''Missions''' | ||
| + | * [[Ghost Widow#Go through the portal|Go through the portal]] (and corresponding ''Time After Time'' mission from any villain patron contact) | ||
| + | |||
| + | '''Notes''' | ||
| + | * This map is based on the normal Cap au Diable zone map and uses the same coordinates. The "exterior" of the map, outside the limits of the laboratory area, can be accessed by making a demo recording in Cap au Diable and then replacing the map name with this one. Some of the exterior art is incomplete since it is not normally meant to be seen except via the window view from the lab. | ||
| + | |- | ||
| + | |} | ||
| + | {{clr}} | ||
| + | |||
| + | === Mole Point Portal === | ||
| + | |||
| + | {| border="0" cellspacing="0" cellpadding="5" align="left" | ||
| + | |-valign="top" | ||
| + | | [[File:MolePointPortal01.jpg|thumb|250px|center|{{center|Mole Point Portal}}]] | ||
| '''Demo Map Name:''' ''MAPS/MISSIONS/OUTDOOR_MISSIONS/V_OUTDOOR_SHADOW_MOLEPOINT/V_OUTDOOR_SHADOW_MOLEPOINT.TXT'' | | '''Demo Map Name:''' ''MAPS/MISSIONS/OUTDOOR_MISSIONS/V_OUTDOOR_SHADOW_MOLEPOINT/V_OUTDOOR_SHADOW_MOLEPOINT.TXT'' | ||
| Line 640: | Line 747: | ||
'''Missions''' | '''Missions''' | ||
| − | * [[Johnny Sonata#Kidnap Akarist | Kidnap Akarist]] | + | * [[Johnny Sonata#Kidnap Akarist|Kidnap Akarist]] |
| − | * [[Technician Naylor#Shut down the portal to the shadow shard | Shut down the portal to the shadow shard]] | + | * [[Technician Naylor#Shut down the portal to the shadow shard|Shut down the portal to the shadow shard]] |
|- | |- | ||
|} | |} | ||
{{clr}} | {{clr}} | ||
| − | ===Mother Mayhem's Asylum=== | + | === Mother Mayhem's Asylum === |
{| border="0" cellspacing="0" cellpadding="5" align="left" | {| border="0" cellspacing="0" cellpadding="5" align="left" | ||
|-valign="top" | |-valign="top" | ||
| − | | [[ | + | | [[File:Asylum01.jpg|thumb|250px|center|{{center|Mother Mayhem's Hospital}}]] |
| '''Demo Map Name:''' ''MAPS/MISSIONS/UNIQUE/ARTIFIED/MOTHER_MAYHEM_HOSPITAL.TXT'' | | '''Demo Map Name:''' ''MAPS/MISSIONS/UNIQUE/ARTIFIED/MOTHER_MAYHEM_HOSPITAL.TXT'' | ||
| Line 658: | Line 765: | ||
'''Missions''' | '''Missions''' | ||
| − | * [[Maria Jenkins#Check out the asylum | Check out the asylum]] | + | * [[Maria Jenkins#Check out the asylum|Check out the asylum]] |
|- | |- | ||
|} | |} | ||
{{clr}} | {{clr}} | ||
| − | ===Nemesis Shadow Shard Base=== | + | === Nemesis Shadow Shard Base === |
{| border="0" cellspacing="0" cellpadding="5" align="left" | {| border="0" cellspacing="0" cellpadding="5" align="left" | ||
|-valign="top" | |-valign="top" | ||
| − | | [[ | + | | [[File:NemesisSSBase01.jpg|thumb|250px|center|{{center|Nemesis Shadow Shard Base}}]] |
| '''Demo Map Name:''' ''MAPS/MISSIONS/OUTDOOR_MISSIONS/OUTDOOR_RIKTI_WAR_ZONE/IOM_OUTDOOR_SHADOW_NEMESIS/IOM_OUTDOOR_SHADOW_NEMESIS.TXT'' | | '''Demo Map Name:''' ''MAPS/MISSIONS/OUTDOOR_MISSIONS/OUTDOOR_RIKTI_WAR_ZONE/IOM_OUTDOOR_SHADOW_NEMESIS/IOM_OUTDOOR_SHADOW_NEMESIS.TXT'' | ||
| Line 675: | Line 782: | ||
'''Missions''' | '''Missions''' | ||
| − | * [[Dark Watcher#Investigate Nemesis Base | Investigate Nemesis Base]] | + | * [[The Dark Watcher (Primal Earth)#Investigate Nemesis Base|Investigate Nemesis Base]] |
|- | |- | ||
|} | |} | ||
{{clr}} | {{clr}} | ||
| − | ===Nemesis Shadow Shard Portal=== | + | === Nemesis Shadow Shard Portal === |
{| border="0" cellspacing="0" cellpadding="5" align="left" | {| border="0" cellspacing="0" cellpadding="5" align="left" | ||
|-valign="top" | |-valign="top" | ||
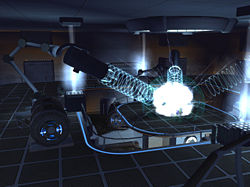
| − | | [[ | + | | [[File:NemesisSSPortal01.jpg|thumb|250px|center|{{center|Nemesis Portal}}]] |
| '''Demo Map Name:''' ''MAPS/MISSIONS/OUTDOOR_MISSIONS/OUTDOOR_RIKTI_WAR_ZONE/IOM_OUTDOOR_SHADOW_NEMESIS/IOM_OUTDOOR_SHADOW_NEMESIS.TXT'' | | '''Demo Map Name:''' ''MAPS/MISSIONS/OUTDOOR_MISSIONS/OUTDOOR_RIKTI_WAR_ZONE/IOM_OUTDOOR_SHADOW_NEMESIS/IOM_OUTDOOR_SHADOW_NEMESIS.TXT'' | ||
| Line 692: | Line 799: | ||
'''Missions''' | '''Missions''' | ||
| − | * [[Dark Watcher#Investigate Nemesis Base | Investigate Nemesis Base]] | + | * [[The Dark Watcher (Primal Earth)#Investigate Nemesis Base|Investigate Nemesis Base]] |
|- | |- | ||
|} | |} | ||
{{clr}} | {{clr}} | ||
| − | ===Oranbega Cathedral=== | + | === Oranbega Cathedral === |
{| border="0" cellspacing="0" cellpadding="5" align="left" | {| border="0" cellspacing="0" cellpadding="5" align="left" | ||
|-valign="top" | |-valign="top" | ||
| − | | [[ | + | | [[File:CoTCathedral01.jpg|thumb|250px|center|{{center|Oranbega Cathedral}}]] |
| '''Demo Map Name:''' ''MAPS/MISSIONS/UNIQUE/V_SHARKHEAD/COT_AURA_MISSION_KALINDA.TXT'' | | '''Demo Map Name:''' ''MAPS/MISSIONS/UNIQUE/V_SHARKHEAD/COT_AURA_MISSION_KALINDA.TXT'' | ||
| Line 709: | Line 816: | ||
'''Missions''' | '''Missions''' | ||
| − | * [[Kalinda#Unlock power of destined one (Auras Mission) | Unlock power of destined one (Auras Mission)]] (third part - "Offer artifacts to Powers") | + | * [[Kalinda#Unlock power of destined one (Auras Mission)|Unlock power of destined one (Auras Mission)]] (third part - "Offer artifacts to Powers") |
'''Notes''' | '''Notes''' | ||
| Line 717: | Line 824: | ||
{{clr}} | {{clr}} | ||
| − | ===Portal Corp Under Siege=== | + | === Portal Corp Under Siege === |
{| border="0" cellspacing="0" cellpadding="5" align="left" | {| border="0" cellspacing="0" cellpadding="5" align="left" | ||
|-valign="top" | |-valign="top" | ||
| − | | [[ | + | | [[File:PortalCorp1.jpg|thumb|250px|center|{{center|Portal Corp Battleground}}]] |
| '''Demo Map Name:''' ''MAPS/MISSIONS/OUTDOOR_MISSIONS/OUTDOOR_RIKTI_WAR_ZONE/IOM_PORTAL_CORP/IOM_PORTAL_CORP.TXT'' | | '''Demo Map Name:''' ''MAPS/MISSIONS/OUTDOOR_MISSIONS/OUTDOOR_RIKTI_WAR_ZONE/IOM_PORTAL_CORP/IOM_PORTAL_CORP.TXT'' | ||
| Line 729: | Line 836: | ||
'''Missions''' | '''Missions''' | ||
| − | * [[Serpent Drummer#Defend Portal Corporation | Defend Portal Corporation]] | + | * [[Serpent Drummer#Defend Portal Corporation|Defend Portal Corporation]] |
|- | |- | ||
|} | |} | ||
{{clr}} | {{clr}} | ||
| − | ===Portal Lab=== | + | === Portal Lab === |
{| border="0" cellspacing="0" cellpadding="5" align="left" | {| border="0" cellspacing="0" cellpadding="5" align="left" | ||
|-valign="top" | |-valign="top" | ||
| − | | [[ | + | | [[File:PortalCorpLab1.jpg|thumb|250px|center|{{center|Portal Base}}]] |
| '''Demo Map Name:''' ''MAPS/MISSIONS/UNIQUE/CAPAUDIABLE/TECH_PORTALENTRY.TXT'' | | '''Demo Map Name:''' ''MAPS/MISSIONS/UNIQUE/CAPAUDIABLE/TECH_PORTALENTRY.TXT'' | ||
| Line 746: | Line 853: | ||
'''Missions''' | '''Missions''' | ||
| − | * [[Technician Naylor#Get coordinates for the 'Shadow Shard' from Portal Corp | Get coordinates for the 'Shadow Shard' from Portal Corp]] | + | * [[Technician Naylor#Get coordinates for the 'Shadow Shard' from Portal Corp|Get coordinates for the 'Shadow Shard' from Portal Corp]] |
| − | * [[Technician Naylor#Attack Longbow portal base. | Attack Longbow portal base.]] | + | * [[Technician Naylor#Attack Longbow portal base.|Attack Longbow portal base.]] |
|- | |- | ||
|} | |} | ||
{{clr}} | {{clr}} | ||
| − | ===Power Transfer System (PTS)=== | + | === Power Transfer System (PTS) === |
{| border="0" cellspacing="0" cellpadding="5" align="left" | {| border="0" cellspacing="0" cellpadding="5" align="left" | ||
|-valign="top" | |-valign="top" | ||
| − | | [[ | + | | [[File:PTSControlRoom1.jpg|thumb|250px|center|{{center|PTS Control Room}}]] |
| '''Demo Map Name:''' ''MAPS/MISSIONS/UNIQUE/CAPAUDIABLE/PTS_CONTROLBUNKER.TXT'' | | '''Demo Map Name:''' ''MAPS/MISSIONS/UNIQUE/CAPAUDIABLE/PTS_CONTROLBUNKER.TXT'' | ||
| Line 764: | Line 871: | ||
'''Missions''' | '''Missions''' | ||
| − | * [[Marshal Brass#Find out what's wrong with the Power Transfer System for Marshal Brass | Find out what's wrong with the Power Transfer System for Marshal Brass]] | + | * [[Marshal Brass#Find out what's wrong with the Power Transfer System for Marshal Brass|Find out what's wrong with the Power Transfer System for Marshal Brass]] |
| − | * [[Serpent Drummer#Fight back Rikti attacks | Fight back Rikti attacks]] (second part - ''"Defend PTS"'') | + | * [[Serpent Drummer#Fight back Rikti attacks|Fight back Rikti attacks]] (second part - ''"Defend PTS"'') |
|- | |- | ||
|} | |} | ||
{{clr}} | {{clr}} | ||
| − | ===President Marchand's Penthouse=== | + | === President Marchand's Penthouse === |
{| border="0" cellspacing="0" cellpadding="5" align="left" | {| border="0" cellspacing="0" cellpadding="5" align="left" | ||
|-valign="top" | |-valign="top" | ||
| − | | [[ | + | | [[File:PresidentialRoom1.jpg|thumb|250px|center|{{center|President Marchand's Building}}]] |
| '''Demo Map Name:''' ''MAPS/MISSIONS/OUTDOOR_MISSIONS/OUTDOOR_FLASHBACK/IOM_ST_MARTIAL/IOM_ST_MARTIAL.TXT'' | | '''Demo Map Name:''' ''MAPS/MISSIONS/OUTDOOR_MISSIONS/OUTDOOR_FLASHBACK/IOM_ST_MARTIAL/IOM_ST_MARTIAL.TXT'' | ||
| Line 782: | Line 889: | ||
'''Missions''' | '''Missions''' | ||
| − | * [[Mender Tesseract Strike Force#Take out Marchand once and for all | Take out Marchand once and for all]] | + | * [[Mender Tesseract Strike Force#Take out Marchand once and for all|Take out Marchand once and for all]] |
|- | |- | ||
|} | |} | ||
{{clr}} | {{clr}} | ||
| − | ===Rikti Homeworld Portal=== | + | === Rikti Homeworld Portal === |
{| border="0" cellspacing="0" cellpadding="5" align="left" | {| border="0" cellspacing="0" cellpadding="5" align="left" | ||
|-valign="top" | |-valign="top" | ||
| − | | [[ | + | | [[File:UnderMothership1.jpg|thumb|250px|center|{{center|Beneath the Rikti Mothership}}]] |
| '''Demo Map Name:''' ''MAPS/MISSIONS/UNIQUE/RIKTI_WAR_ZONE/PORTAL_CAVERN_02/PORTAL_CAVERN_02.TXT'' | | '''Demo Map Name:''' ''MAPS/MISSIONS/UNIQUE/RIKTI_WAR_ZONE/PORTAL_CAVERN_02/PORTAL_CAVERN_02.TXT'' | ||
| Line 799: | Line 906: | ||
'''Missions''' | '''Missions''' | ||
| − | * [[The Dark Watcher#Stop Hro'Dtohz and save the world | Stop Hro'Dtohz and save the world]] | + | * [[The Dark Watcher (Primal Earth)#Stop Hro'Dtohz and save the world|Stop Hro'Dtohz and save the world]] |
'''Notes''' | '''Notes''' | ||
| Line 807: | Line 914: | ||
{{clr}} | {{clr}} | ||
| − | ===Rikti Peace Conference=== | + | === Rikti Peace Conference === |
{| border="0" cellspacing="0" cellpadding="5" align="left" | {| border="0" cellspacing="0" cellpadding="5" align="left" | ||
|-valign="top" | |-valign="top" | ||
| − | | [[ | + | | [[File:PeaceTalkings1.jpg|thumb|250px|center|{{center|Rikti Peace Talks}}]] |
| '''Demo Map Name:''' ''MAPS/MISSIONS/UNIQUE/RIKTI_WAR_ZONE/VANGUARD_BASE_INTERIOR/VANGUARD_BASE_INTERIOR.TXT'' | | '''Demo Map Name:''' ''MAPS/MISSIONS/UNIQUE/RIKTI_WAR_ZONE/VANGUARD_BASE_INTERIOR/VANGUARD_BASE_INTERIOR.TXT'' | ||
| Line 819: | Line 926: | ||
'''Missions''' | '''Missions''' | ||
| − | * [[Serpent Drummer#Help with Conference Security | Help with Conference Security]] | + | * [[Serpent Drummer#Help with Conference Security|Help with Conference Security]] |
|- | |- | ||
|} | |} | ||
{{clr}} | {{clr}} | ||
| − | ===S.E.R.A.P.H. Facility=== | + | === S.E.R.A.P.H. Facility === |
{| border="0" cellspacing="0" cellpadding="5" align="left" | {| border="0" cellspacing="0" cellpadding="5" align="left" | ||
|-valign="top" | |-valign="top" | ||
| − | | [[ | + | | [[File:Seraphhq01.jpg|thumb|250px|center|{{center|S.E.R.A.P.H. Steel Canyon Facility}}]] |
| '''Demo Map Name:''' ''MAPS/MISSIONS/OUTDOOR_MISSIONS/V_OUTDOOR_STEELCANYON/SERAPH_LAB/V_OUTDOOR_STEELCANYON_SERAPH_LAB.TXT'' | | '''Demo Map Name:''' ''MAPS/MISSIONS/OUTDOOR_MISSIONS/V_OUTDOOR_STEELCANYON/SERAPH_LAB/V_OUTDOOR_STEELCANYON_SERAPH_LAB.TXT'' | ||
| Line 836: | Line 943: | ||
'''Missions''' | '''Missions''' | ||
| − | * [[Ghost Widow#Kidnap Dr. Franks | Kidnap Dr. Franks]] | + | * [[Ghost Widow#Kidnap Dr. Franks|Kidnap Dr. Franks]] |
| + | |||
| + | '''Notes''' | ||
| + | * This is a two-part map which includes an "exterior" area based on a portion of Steel Canyon, and an "interior" area consisting of the S.E.R.A.P.H. facility. | ||
|- | |- | ||
|} | |} | ||
{{clr}} | {{clr}} | ||
| − | ===Salamanca=== | + | === Salamanca === |
{| border="0" cellspacing="0" cellpadding="5" align="left" | {| border="0" cellspacing="0" cellpadding="5" align="left" | ||
|-valign="top" | |-valign="top" | ||
| − | | [[ | + | | [[File:SalamancaHenges1.jpg|thumb|250px|center|{{center|Salamanca Henges}}]] |
| '''Demo Map Name:''' ''MAPS/MISSIONS/OUTDOOR_MISSIONS/OUTDOOR_CROATOA/OUTDOOR_CROATOA_03/OUTDOOR_CROATOA_03.TXT'' | | '''Demo Map Name:''' ''MAPS/MISSIONS/OUTDOOR_MISSIONS/OUTDOOR_CROATOA/OUTDOOR_CROATOA_03/OUTDOOR_CROATOA_03.TXT'' | ||
| Line 853: | Line 963: | ||
'''Missions''' | '''Missions''' | ||
| − | * [[Buck Salinger#Stop takeover of Salamanca | Stop takeover of Salamanca]] | + | * [[Buck Salinger#Stop takeover of Salamanca|Stop takeover of Salamanca]] |
|- | |- | ||
|} | |} | ||
{{clr}} | {{clr}} | ||
| − | ===Skyway City Rescue=== | + | === Skyway City Rescue === |
{| border="0" cellspacing="0" cellpadding="5" align="left" | {| border="0" cellspacing="0" cellpadding="5" align="left" | ||
|-valign="top" | |-valign="top" | ||
| − | | [[ | + | | [[File:Olivia_Darque_Rescue_screenshot.jpg|thumb|250px|center|{{center|Longbow Ambush in Skyway}}]] |
| '''Demo Map Name:''' ''MAPS/MISSIONS/OUTDOOR_MISSIONS/V_OUTDOOR_SKYWAY/V_OUTDOOR_SKYWAY_BLOCKADE.TXT'' | | '''Demo Map Name:''' ''MAPS/MISSIONS/OUTDOOR_MISSIONS/V_OUTDOOR_SKYWAY/V_OUTDOOR_SKYWAY_BLOCKADE.TXT'' | ||
| Line 870: | Line 980: | ||
'''Missions''' | '''Missions''' | ||
| − | * [[Peter Themari#Secure Olivia Darque from the Longbow ambush | Secure Olivia Darque from the Longbow ambush]] | + | * [[Peter Themari#Secure Olivia Darque from the Longbow ambush|Secure Olivia Darque from the Longbow ambush]] |
|- | |- | ||
|} | |} | ||
{{clr}} | {{clr}} | ||
| − | ===Snake Temple=== | + | === Snake Temple === |
{| border="0" cellspacing="0" cellpadding="5" align="left" | {| border="0" cellspacing="0" cellpadding="5" align="left" | ||
|-valign="top" | |-valign="top" | ||
| − | | [[ | + | | [[File:SnakesTemple1.jpg|thumb|250px|center|{{center|Snake Temple}}]] |
| '''Demo Map Name:''' ''MAPS/MISSIONS/UNIQUE/SNAKECAVES/SNAKECAVES_45/SNAKECAVES_45_LAYOUT_01.TXT'' | | '''Demo Map Name:''' ''MAPS/MISSIONS/UNIQUE/SNAKECAVES/SNAKECAVES_45/SNAKECAVES_45_LAYOUT_01.TXT'' | ||
| Line 887: | Line 997: | ||
'''Missions''' | '''Missions''' | ||
| − | * [[Mongoose#Take out Snake Temple | Take out Snake Temple]] | + | * [[Mongoose#Take out Snake Temple|Take out Snake Temple]] |
|- | |- | ||
|} | |} | ||
{{clr}} | {{clr}} | ||
| − | ===Speakeasy=== | + | === Speakeasy === |
{| border="0" cellspacing="0" cellpadding="5" align="left" | {| border="0" cellspacing="0" cellpadding="5" align="left" | ||
|-valign="top" | |-valign="top" | ||
| − | | [[ | + | | [[File:Speakeasy1.jpg|thumb|250px|center|{{center|Speakeasy}}]] |
| '''Demo Map Name:''' ''MAPS/MISSIONS/UNIQUE/V_CAP_AU_DIABLE/SPEAKEASY.TXT'' | | '''Demo Map Name:''' ''MAPS/MISSIONS/UNIQUE/V_CAP_AU_DIABLE/SPEAKEASY.TXT'' | ||
| Line 904: | Line 1,014: | ||
'''Missions''' | '''Missions''' | ||
| − | * [[Rogue Isle Protector#Big spenders spotted at the speakeasy! | Big spenders spotted at the speakeasy!]] (Cap au Diable Newspaper mission) | + | * [[Rogue Isle Protector#Big spenders spotted at the speakeasy!|Big spenders spotted at the speakeasy!]] (Cap au Diable Newspaper mission) |
|- | |- | ||
|} | |} | ||
{{clr}} | {{clr}} | ||
| − | ===Steel Canyon Extraction=== | + | === Steel Canyon Extraction === |
{| border="0" cellspacing="0" cellpadding="5" align="left" | {| border="0" cellspacing="0" cellpadding="5" align="left" | ||
|-valign="top" | |-valign="top" | ||
| − | | [[ | + | | [[File:ArachnosSteel01.jpg|thumb|250px|center|{{center|Lord Recluse Demands Gyros!}}]] |
| '''Demo Map Name:''' ''MAPS/MISSIONS/OUTDOOR_MISSIONS/V_OUTDOOR_STEELCANYON/SERAPH_LAB/V_OUTDOOR_STEELCANYON_SERAPH_LAB.TXT'' | | '''Demo Map Name:''' ''MAPS/MISSIONS/OUTDOOR_MISSIONS/V_OUTDOOR_STEELCANYON/SERAPH_LAB/V_OUTDOOR_STEELCANYON_SERAPH_LAB.TXT'' | ||
| Line 921: | Line 1,031: | ||
'''Missions''' | '''Missions''' | ||
| − | * [[Ghost Widow#Kidnap Dr. Franks | Kidnap Dr. Franks]] | + | * [[Ghost Widow#Kidnap Dr. Franks|Kidnap Dr. Franks]] |
| + | |||
| + | '''Notes''' | ||
| + | * This is a two-part map which includes an "exterior" area based on a portion of Steel Canyon, and an "interior" area consisting of the S.E.R.A.P.H. facility. | ||
|- | |- | ||
|} | |} | ||
{{clr}} | {{clr}} | ||
| − | ===Stheno's Lair=== | + | === Stheno's Lair === |
{| border="0" cellspacing="0" cellpadding="5" align="left" | {| border="0" cellspacing="0" cellpadding="5" align="left" | ||
|-valign="top" | |-valign="top" | ||
| − | | [[ | + | | [[File:SthenosLair01.jpg|thumb|250px|center|{{center|Stheno's Lair}}]] |
| '''Demo Map Name:''' ''MAPS/MISSIONS/UNIQUE/V_GRANDVILLE/STHENOS_LAIR.TXT'' | | '''Demo Map Name:''' ''MAPS/MISSIONS/UNIQUE/V_GRANDVILLE/STHENOS_LAIR.TXT'' | ||
| Line 938: | Line 1,051: | ||
'''Missions''' | '''Missions''' | ||
| − | * [[Operative Grillo#Raid Snake Temple | Raid Snake Temple]] | + | * [[Operative Grillo#Raid Snake Temple|Raid Snake Temple]] |
|- | |- | ||
|} | |} | ||
{{clr}} | {{clr}} | ||
| − | ===Superadine Lab=== | + | === Superadine Lab === |
{| border="0" cellspacing="0" cellpadding="5" align="left" | {| border="0" cellspacing="0" cellpadding="5" align="left" | ||
|-valign="top" | |-valign="top" | ||
| − | | [[ | + | | [[File:SuperadineLab1.jpg|thumb|250px|center|{{center|Skulls' Superadine Lab}}]] |
| '''Demo Map Name:''' ''MAPS/MISSIONS/UNIQUE/DOORMISSIONS/SKULLS_SUPERADINE_LAB.TXT'' | | '''Demo Map Name:''' ''MAPS/MISSIONS/UNIQUE/DOORMISSIONS/SKULLS_SUPERADINE_LAB.TXT'' | ||
| Line 955: | Line 1,068: | ||
'''Missions''' | '''Missions''' | ||
| − | * [[Antonio Nash#Take Out Dyne Warehouse | Take Out Dyne Warehouse]] (third part - ''"Defeat all Skulls in warehouse"'') | + | * [[Antonio Nash (Pre-Issue 21)#Take Out Dyne Warehouse|Take Out Dyne Warehouse]] (third part - ''"Defeat all Skulls in warehouse"'') |
| − | * [[Prince Kiros Nandelu#Put a stop to the gang activity in the office | Put a stop to the gang activity in the office]] (fourth part - ''"Defeat all Skulls in warehouse"'') | + | * [[Prince Kiros Nandelu#Put a stop to the gang activity in the office|Put a stop to the gang activity in the office]] (fourth part - ''"Defeat all Skulls in warehouse"'') |
|- | |- | ||
|} | |} | ||
{{clr}} | {{clr}} | ||
| − | ===Tiki Lounge=== | + | === Tiki Lounge === |
{| border="0" cellspacing="0" cellpadding="5" align="left" | {| border="0" cellspacing="0" cellpadding="5" align="left" | ||
|-valign="top" | |-valign="top" | ||
| − | | [[ | + | | [[File:Casino1.jpg|thumb|250px|center|{{center|Larry's Tiki Lounge}}]] |
| '''Demo Map Name:''' ''MAPS/MISSIONS/UNIQUE/MERCYISLAND/CASINO_TIKI_01.TXT'' | | '''Demo Map Name:''' ''MAPS/MISSIONS/UNIQUE/MERCYISLAND/CASINO_TIKI_01.TXT'' | ||
| Line 973: | Line 1,086: | ||
'''Missions''' | '''Missions''' | ||
| − | * [[Mongoose#Clear Snakes Out of Casino | Clear Snakes Out of Casino]] | + | * [[Mongoose#Clear Snakes Out of Casino|Clear Snakes Out of Casino]] |
|- | |- | ||
|} | |} | ||
{{clr}} | {{clr}} | ||
| − | ===Troll Lair=== | + | === Troll Lair === |
{| border="0" cellspacing="0" cellpadding="5" align="left" | {| border="0" cellspacing="0" cellpadding="5" align="left" | ||
|-valign="top" | |-valign="top" | ||
| − | | [[ | + | | [[File:TrollLair1.jpg|thumb|250px|center|{{center|Atta's Throne Room}}]] |
| '''Demo Map Name:''' ''MAPS/MISSIONS/UNIQUE/DOORMISSIONS/TROLLS_LAIR.TXT'' | | '''Demo Map Name:''' ''MAPS/MISSIONS/UNIQUE/DOORMISSIONS/TROLLS_LAIR.TXT'' | ||
| Line 990: | Line 1,103: | ||
'''Missions''' | '''Missions''' | ||
| − | * [[Talshak the Mystic#Defeat Trolls' leader, Atta | Defeat Trolls' leader, Atta]] | + | * [[Talshak the Mystic#Defeat Trolls' leader, Atta|Defeat Trolls' leader, Atta]] |
| − | * [[Mercedes Sheldon#Take Down Hector's Generals | Take Down Hector's Generals]] | + | * [[Mercedes Sheldon#Take Down Hector's Generals|Take Down Hector's Generals]] |
|- | |- | ||
|} | |} | ||
{{clr}} | {{clr}} | ||
| − | ===Tsoo Tattoo Parlor=== | + | === Tsoo Tattoo Parlor === |
{| border="0" cellspacing="0" cellpadding="5" align="left" | {| border="0" cellspacing="0" cellpadding="5" align="left" | ||
|-valign="top" | |-valign="top" | ||
| − | | [[ | + | | [[File:TsooTattoingParlor1.jpg|thumb|250px|center|{{center|Tsoo Tattoo Parlor}}]] |
| '''Demo Map Name:''' ''MAPS/MISSIONS/UNIQUE/ARTIFIED/TSOO_TATTOO_PARLOR.TXT'' | | '''Demo Map Name:''' ''MAPS/MISSIONS/UNIQUE/ARTIFIED/TSOO_TATTOO_PARLOR.TXT'' | ||
| Line 1,008: | Line 1,121: | ||
'''Missions''' | '''Missions''' | ||
| − | * [[Cho Ge#Recover some of the Tsoo's tattooing materials | Recover some of the Tsoo's tattooing materials]] from level 15-19 Natural origin contacts | + | * [[Cho Ge#Recover some of the Tsoo's tattooing materials|Recover some of the Tsoo's tattooing materials]] from level 15-19 Natural origin contacts |
|- | |- | ||
|} | |} | ||
{{clr}} | {{clr}} | ||
| − | ===Tyrant's Lair=== | + | === Tyrant's Lair === |
{| border="0" cellspacing="0" cellpadding="5" align="left" | {| border="0" cellspacing="0" cellpadding="5" align="left" | ||
|-valign="top" | |-valign="top" | ||
| − | | [[ | + | | [[File:TyrantsThrone01.jpg|thumb|250px|center|{{center|Tyrant's Throne}}]] |
| '''Demo Map Name:''' ''MAPS/MISSIONS/UNIQUE/ARTIFIED/TYRANTS_LAIR.TXT'' | | '''Demo Map Name:''' ''MAPS/MISSIONS/UNIQUE/ARTIFIED/TYRANTS_LAIR.TXT'' | ||
| Line 1,025: | Line 1,138: | ||
'''Missions''' | '''Missions''' | ||
| − | * [[Maria Jenkins#Free Statesman | Free Statesman]] | + | * [[Maria Jenkins#Free Statesman|Free Statesman]] |
|- | |- | ||
|} | |} | ||
{{clr}} | {{clr}} | ||
| − | ===Winter Event Mission Map=== | + | === Winter Event Mission Map === |
{| border="0" cellspacing="0" cellpadding="5" align="left" | {| border="0" cellspacing="0" cellpadding="5" align="left" | ||
|-valign="top" | |-valign="top" | ||
| − | | [[ | + | | [[File:WinterEventBNYMap.jpg|thumb|250px|center|{{center|Winter Comes To Croatoa}}]] |
| '''Demo Map Name:''' ''MAPS/MISSIONS/UNIQUE/WINTER_06/WINTER_EVENT06_CROATOA.TXT'' | | '''Demo Map Name:''' ''MAPS/MISSIONS/UNIQUE/WINTER_06/WINTER_EVENT06_CROATOA.TXT'' | ||
| Line 1,042: | Line 1,155: | ||
'''Missions''' | '''Missions''' | ||
| − | * [[Father Time#Rescue Baby New Year from Snaptooth! | Rescue Baby New Year from Snaptooth!]] | + | * [[Father Time#Rescue Baby New Year from Snaptooth!|Rescue Baby New Year from Snaptooth!]] |
|- | |- | ||
|} | |} | ||
Latest revision as of 20:19, 30 January 2014
Contents
- 1 Overview
- 2 See Also
- 3 List of Scenic Maps
- 3.1 5th Column Overthrow
- 3.2 Arachnos Base On Fire
- 3.3 Arachnos Base On Fire II
- 3.4 Arachnos Snake-Infested Base
- 3.5 Arachnos Sub Base
- 3.6 Arachnos Test of Dedication
- 3.7 Arachnos Warehouse
- 3.8 Atlas Park Destroyed
- 3.9 Atlas Park Destroyed, Wrecked MegaMech
- 3.10 Atlas Park Fashion Show
- 3.11 Atlas Park Meteorite
- 3.12 Atlas Park Statesman's Speech
- 3.13 Boomtown Reconstruction
- 3.14 Burning Forest
- 3.15 Carnie Warehouse
- 3.16 Cemetery (Grand Mausoleum)
- 3.17 Chum Bucket
- 3.18 Clocktower Courtyard
- 3.19 Council Warehouse
- 3.20 Crey Cloning Lab
- 3.21 Crypt Entrance
- 3.22 Crystal Caves
- 3.23 Demon-Infested Tech Lab
- 3.24 Devouring Earth Office
- 3.25 Eden Mission Map
- 3.26 Faultline Dam
- 3.27 Freaklympics
- 3.28 Freakshow Office
- 3.29 Freakshow Warehouse
- 3.30 Frostfire's Hideout
- 3.31 Ghost Widow Summoning Circle
- 3.32 Great Ceremony
- 3.33 Hook and Anchor
- 3.34 Johnny Sonata's Hell
- 3.35 Longbow Island Base
- 3.36 Longbow Officers' Club
- 3.37 Lou's Garage
- 3.38 Lucky Six
- 3.39 Misdirected Portal
- 3.40 Misdirected Portal, Window View
- 3.41 Mole Point Portal
- 3.42 Mother Mayhem's Asylum
- 3.43 Nemesis Shadow Shard Base
- 3.44 Nemesis Shadow Shard Portal
- 3.45 Oranbega Cathedral
- 3.46 Portal Corp Under Siege
- 3.47 Portal Lab
- 3.48 Power Transfer System (PTS)
- 3.49 President Marchand's Penthouse
- 3.50 Rikti Homeworld Portal
- 3.51 Rikti Peace Conference
- 3.52 S.E.R.A.P.H. Facility
- 3.53 Salamanca
- 3.54 Skyway City Rescue
- 3.55 Snake Temple
- 3.56 Speakeasy
- 3.57 Steel Canyon Extraction
- 3.58 Stheno's Lair
- 3.59 Superadine Lab
- 3.60 Tiki Lounge
- 3.61 Troll Lair
- 3.62 Tsoo Tattoo Parlor
- 3.63 Tyrant's Lair
- 3.64 Winter Event Mission Map
Overview
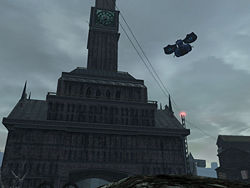
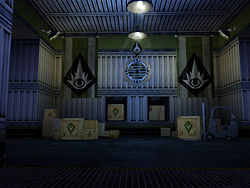
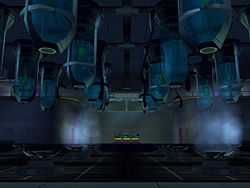
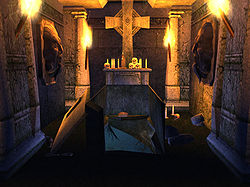
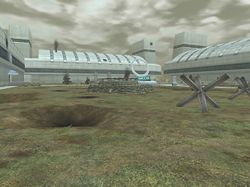
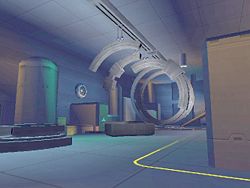
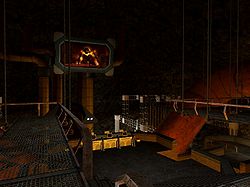
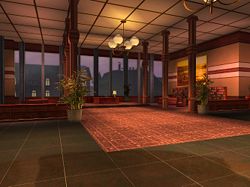
Of the available maps used by the game, there are certain unique maps which either utilize an artified version of the standard map sets (often with art specific to a particular villain group) or are wholly unique in art and/or design. These maps are often of particular interest in demo editing as they provide for a unique setting or backdrop which stands out from the common map sets.
This page provides a listing of screenshots representing these unique or scenic maps, along with associated information which may be useful for demo editing. This includes the following:
- Demo Map Name: This is the file name of the map required to display the map in question using a demo, via the demo Map command.
- CAM POS: This provides the variables, as used by demos, for positioning the demo POV of the screenshot as shown. This is of particular use for creating demos from scratch as it provides a reference point within the map for placing the camera and other entities. Without POS values it can be very difficult to work with a map from scratch as some way to determine the coordinates which lie within the boundaries of the map are required to create a meaningful demo recording. The POS values given are that of the camera as it was placed to create the screenshot shown.
- CAM PYR: Similar to POS entry, this gives the demo PYR variables, as used by a demo, which represent the orientation of the camera corresponding to the screenshot shown.
- Missions: This provides a list of internal links to missions known to utilize the map in question. It is not always simplest to create a demo from scratch, and this information gives the mission where the map is encountered, allowing players to actually run that particular mission for "live" recording.
- Notes: Any other comments, remarks, or items of interest for the map in question are provided here.
This is a partial list. Some maps may be represented with more than one screenshot to illustrate different views or art.
With the live release of Issue 14 and the Mission Architect, players will be able to access many of the unique and scenic maps via missions created using the Mission Architect. For demo recording and movie-making purposes, this will provide easier access to those maps available in this fashion. Rather than editing a demo to use a specific map, or trying to track down a specific mission which uses a particular map for "live" filming, movie-makers will simply be able to create a custom mission in the Mission Architect with the map and setting of their choice.
See Also
List of Scenic Maps
5th Column Overthrow
| Demo Map Name: MAPS/MISSIONS/UNIQUE/FLASHBACK/FB_COLUMN_OVERTHROW/FB_5TH_COLUMN_OVERTHROW_M4.TXT
CAM POS: 414.474 -12.497 709.975 CAM PYR: 0.186 -0.341 -0 Missions |
Arachnos Base On Fire
| Demo Map Name: MAPS/MISSIONS/UNIQUE/ARACHNOS_UNIQUE/ARACHNOS_GENERAL_ONFIRE_01.TXT
CAM POS: 10.650 5.787 406.913 CAM PYR: -0.036 2.976 -0 Missions |
Arachnos Base On Fire II
| Demo Map Name: MAPS/MISSIONS/UNIQUE/ARACHNOS_UNIQUE/ARACHNOS_MERCY_ONFIRE_01.TXT
CAM POS: 16.141 5.643 383.838 CAM PYR: -0.074 1.539 0 Missions |
Arachnos Snake-Infested Base
| Demo Map Name: MAPS/MISSIONS/UNIQUE/ARACHNOS_UNIQUE/ARACHNOS_SNAKES_01.TXT
CAM POS: -108.932 21.787 346.812 CAM PYR: 0.198 -2.849 -0 Missions |
Arachnos Sub Base
| Demo Map Name: MAPS/MISSIONS/UNIQUE/FAULTLINE/SUBBASE/ARACHNOS_SUBBASE.TXT
CAM POS: 478.910 -244.902 -366.240 CAM PYR: -0.088 -1.182 0 Missions |
Arachnos Test of Dedication
| Demo Map Name: MAPS/MISSIONS/UNIQUE/FLASHBACK/SPIDER_WEAVES_HIS_WEB/SWHW_SNAKECAVES/SWHW_SNAKECAVES.TXT
CAM POS: -4245.467 -1352.419 -5347.751 CAM PYR: -0.028 1.584 -0 Missions |
Arachnos Warehouse
| Demo Map Name: maps/Missions/unique/V_Warehouse_Arachnos/V_Warehouse_Arachnos_30_Layout_02.txt
CAM POS: 434.055 10.321 1147.819 CAM PYR: 0.070 -0.929 0 Missions
Notes
|
Atlas Park Destroyed
| Demo Map Name: MAPS/MISSIONS/OUTDOOR_MISSIONS/V_OUTDOOR_ATLAS/RECLUSE_RUINED/V_OUTDOOR_ATLAS_RECLUSE.TXT
CAM POS: 497.320 84.925 -188.959 CAM PYR: -0.018 0.911 -0 Missions
|
Atlas Park Destroyed, Wrecked MegaMech
| Demo Map Name: MAPS/MISSIONS/OUTDOOR_MISSIONS/V_OUTDOOR_ATLAS/RECLUSE_RUINED/V_OUTDOOR_ATLAS_RECLUSE.TXT
CAM POS: 541.404 4.954 -502.910 CAM PYR: -0.148 -1.286 0 Missions
Notes
|
Atlas Park Fashion Show
| Demo Map Name: MAPS/MISSIONS/OUTDOOR_MISSIONS/OUTDOOR_FLASHBACK/IOM_FB_ATLAS_PARK_SAM/IOM_FB_ATLAS_PARK_SAM.TXT
CAM POS: 98.483 5.5 67.341 CAM PYR: -0.294 -0.135 -0 Missions Notes
|
Atlas Park Meteorite
| Demo Map Name: MAPS/MISSIONS/OUTDOOR_MISSIONS/OUTDOOR_FLASHBACK/IOM_FB_ATLAS_PARK_WTO/IOM_FB_ATLAS_PARK_WTO.TXT
CAM POS: -123.661 28.718 -390.821 CAM PYR: -0.078 -0.576 0 Missions |
Atlas Park Statesman's Speech
| |
Demo Map Name: MAPS/MISSIONS/OUTDOOR_MISSIONS/V_OUTDOOR_ATLAS/VEAT_SL9_DESSLOCK/STATESMANSSPEACH.TXT
CAM POS: CAM PYR: Missions |
Boomtown Reconstruction
| Demo Map Name: MAPS/MISSIONS/OUTDOOR_MISSIONS/V_OUTDOOR_BOOMTOWN/V_OUTDOOR_BOOMTOWN_RECONSTRUCTION.TXT
CAM POS: -1460.869 6.000 5606.935 CAM PYR: -0.112 0.343 0 Missions |
Burning Forest
| Demo Map Name: MAPS/MISSIONS/OUTDOOR_MISSIONS/OUTDOOR_UNIQUE/OUTDOOR_UNIQUE_FOREST_02/OUTDOOR_UNIQUE_FOREST_02C_RIKTI.TXT
CAM POS: -1221.533 -27.303 2010.145 CAM PYR: 0.050 -2.050 -0 Missions |
Carnie Warehouse
| Demo Map Name: MAPS/MISSIONS/UNIQUE/DOORMISSIONS/CARNIVAL_WAREHOUSE_RAVE.TXT
CAM POS: 317.756 36.955 -750.478 CAM PYR: -0.004 -0.899 -0 Missions |
Cemetery (Grand Mausoleum)
| Demo Map Name: MAPS/MISSIONS/OUTDOOR_MISSIONS/OUTDOOR_GRAVEYARD/OUTDOOR_GRAVEYARD_01/OUTDOOR_GRAVEYARD_01A.TXT
CAM POS: 1419.532 43.862 1883.467 CAM PYR: 0.308 0.592 -0 Missions |
Chum Bucket
| Demo Map Name: MAPS/MISSIONS/UNIQUE/V_SHARKHEAD/CHUM_BUCKET.TXT
CAM POS: 24.973 6 95.355 CAM PYR: 0.082 -1.267 -0 Missions
|
Clocktower Courtyard
| Demo Map Name: MAPS/MISSIONS/OUTDOOR_MISSIONS/V_OUTDOOR_MERCY/INST_DL_CLOCKTOWER/INST_DL_CLOCKTOWER.TXT
CAM POS: -1894.901 101.954 -1925.349 CAM PYR: -0.424 -2.931 -0 Missions |
Council Warehouse
| Demo Map Name: MAPS/MISSIONS/UNIQUE/DOORMISSIONS/5TH_COLUMN_WAREHOUSE.TXT
CAM POS: -185.711 4.750 -253.648 CAM PYR: -0.12 -1.596 -0 Missions
|
Crey Cloning Lab
| Demo Map Name: MAPS/MISSIONS/UNIQUE/ARTIFIED/CREY_HERO_LAB.TXT
CAM POS: -3516.556 6.608 -191.690 CAM PYR: -0.192 -1.576 -0 Missions |
Crypt Entrance
| Demo Map Name: maps/Missions/V_Mos_to_smoothcaves/V_Mos_to_Smoothcaves_30/V_Mos_to_Smoothcaves_30_layout_05.txt
CAM POS: -23.730 25.373 39.152 CAM PYR: 0.304 3.131 -0 Missions |
Crystal Caves
| Demo Map Name: MAPS/MISSIONS/UNIQUE/ARTIFIED/V_CRYSTAL_CAVES/CRYSTAL_CAVES.TXT
CAM POS: 1257.716 123.931 494.540 CAM PYR: 1.023 1.764 0 Missions |
Demon-Infested Tech Lab
| Demo Map Name: MAPS/MISSIONS/UNIQUE/V_GRANDVILLE/SMOKEY_LAB.TXT
CAM POS: 172.876 5.056 937.692 CAM PYR: 0.092 1.473 -0 Missions |
Devouring Earth Office
| Demo Map Name: MAPS/MISSIONS/UNIQUE/ARTIFIED/DEVOURING_EARTH_RAMPAGE.TXT
CAM POS: 271.992 41.287 -544.199 CAM PYR: -0.0460 -0.741 0 Missions |
Eden Mission Map
| Demo Map Name: MAPS/MISSIONS/OUTDOOR_MISSIONS/OUTDOOR_EDEN/OUTDOOR_EDEN.TXT
CAM POS: 2308.677 133.022 2616.676 CAM PYR: 0.106 -1.352 0 Missions |
Faultline Dam
| Demo Map Name: MAPS/MISSIONS/UNIQUE/FAULTLINE/DAMLIES/DAMLIES.TXT
CAM POS: -80.180 -1314.450 2262.726 CAM PYR: -0.088 2.048 -0 Missions
|
Freaklympics
| Demo Map Name: MAPS/MISSIONS/UNIQUE/ARTIFIED/FREAK_OLYMPIC_AWARDS.TXT
CAM POS: 565.505 5.5 644.715 CAM PYR: -0.25 -2.81 -0 Missions
|
Freakshow Office
| Demo Map Name: MAPS/MISSIONS/UNIQUE/DOORMISSIONS/FREAKSHOW_ABANDONED_OFFICE.TXT
CAM POS: 1524.990 6.777 448.465 CAM PYR: -0.340 2.440 -0 Missions
|
Freakshow Warehouse
| Demo Map Name: MAPS/MISSIONS/UNIQUE/DOORMISSIONS/FREAKSHOW_ABANDONED_WAREHOUSE.TXT
CAM POS: 329.649 5.287 15.704 CAM PYR: -0.136 2.150 -0 Missions
|
Frostfire's Hideout
| Demo Map Name: MAPS/MISSIONS/UNIQUE/DOORMISSIONS/OUTCASTS_LAIR.TXT
CAM POS: -338.942 5.5 99.111 CAM PYR: -0.116 0.227 0 Missions |
Ghost Widow Summoning Circle
| Demo Map Name: MAPS/MISSIONS/UNIQUE/V_GRANDVILLE/COT_GHOSTWIDOW_SUMMONING_CIRCLE.TXT
CAM POS: 261.728 93.901 235.543 CAM PYR: 1.150 3.004 -0 Missions Notes
|
Great Ceremony
| Demo Map Name: MAPS/MISSIONS/UNIQUE/V_GRANDVILLE/V_GREAT_CEREMONY.TXT
CAM POS: 395.913 561.635 146.933 CAM PYR: 0.35 0.813 0 Missions Notes
|
Hook and Anchor
| Demo Map Name: MAPS/MISSIONS/UNIQUE/V_PORTOAKS/CASINO_HOOK_AND_ANCHOR.TXT
CAM POS: -10.284 5.919 20.773 CAM PYR: 0.012 -2.856 -0 Missions |
Johnny Sonata's Hell
| Demo Map Name: MAPS/MISSIONS/UNIQUE/V_JOHNNYS_HELL/V_JOHNNYS_HELL.TXT
CAM POS: 930.637 -383.146 235.849 CAM PYR: 0.132 3.0522 -0 Missions |
Longbow Island Base
| Demo Map Name: MAPS/MISSIONS/OUTDOOR_MISSIONS/V_OUTDOOR_LONGBOW/V_OUTDOOR_LONGBOW.TXT
CAM POS: 3113.521 62.235 4705.849 CAM PYR: -0.012 -0.024 -0 Missions |
Longbow Officers' Club
| Demo Map Name: MAPS/MISSIONS/UNIQUE/V_NERVA_ISLES/OFFICERS_CLUB.TXT
CAM POS: 110.836 6 107.204 CAM PYR: 0.006 2.081 -0 Missions
|
Lou's Garage
| Demo Map Name: MAPS/MISSIONS/UNIQUE/DOORMISSIONS/LOUS_GARAGE_60.TXT
CAM POS: -288.114 7.585 -767.322 CAM PYR: 0.044 0.385 0 Missions
|
Lucky Six
| Demo Map Name: MAPS/MISSIONS/UNIQUE/V_STMARTIAL/LUCKY_SIX.TXT
CAM POS: 62.679 4.955 134.336 CAM PYR: 0.0460 -0.387 0 Missions
|
Misdirected Portal
| Demo Map Name: MAPS/MISSIONS/UNIQUE/V_GRANDVILLE/MISDIRECTEDPORTAL.TXT
CAM POS: -639.878 198.021 -1722.476 CAM PYR: 0.220 0.271 0 Missions
|
Misdirected Portal, Window View
| Demo Map Name: MAPS/MISSIONS/UNIQUE/V_GRANDVILLE/MISDIRECTEDPORTAL.TXT
CAM POS: -682.099 194.955 -1709.949 CAM PYR: -0.124 2.851 -0 Missions
Notes
|
Mole Point Portal
| Demo Map Name: MAPS/MISSIONS/OUTDOOR_MISSIONS/V_OUTDOOR_SHADOW_MOLEPOINT/V_OUTDOOR_SHADOW_MOLEPOINT.TXT
CAM POS: -235.056 -1779.046 2751.757 CAM PYR: 0.002 -1.709 -0 Missions |
Mother Mayhem's Asylum
| Demo Map Name: MAPS/MISSIONS/UNIQUE/ARTIFIED/MOTHER_MAYHEM_HOSPITAL.TXT
CAM POS: 14.497 23.5 -160.603 CAM PYR: 0.312 -1.586 -0 Missions |
Nemesis Shadow Shard Base
| Demo Map Name: MAPS/MISSIONS/OUTDOOR_MISSIONS/OUTDOOR_RIKTI_WAR_ZONE/IOM_OUTDOOR_SHADOW_NEMESIS/IOM_OUTDOOR_SHADOW_NEMESIS.TXT
CAM POS: -3463.449 1287.550 528.546 CAM PYR: -0.294 2.064 -0 Missions |
Nemesis Shadow Shard Portal
| Demo Map Name: MAPS/MISSIONS/OUTDOOR_MISSIONS/OUTDOOR_RIKTI_WAR_ZONE/IOM_OUTDOOR_SHADOW_NEMESIS/IOM_OUTDOOR_SHADOW_NEMESIS.TXT
CAM POS: -1291.503 1706 1375.324 CAM PYR: -0.090 -1.661 -0 Missions |
Oranbega Cathedral
| Demo Map Name: MAPS/MISSIONS/UNIQUE/V_SHARKHEAD/COT_AURA_MISSION_KALINDA.TXT
CAM POS: -255.483 -217.886 2383.647 CAM PYR: -0.104 3.122 -0 Missions
Notes
|
Portal Corp Under Siege
| Demo Map Name: MAPS/MISSIONS/OUTDOOR_MISSIONS/OUTDOOR_RIKTI_WAR_ZONE/IOM_PORTAL_CORP/IOM_PORTAL_CORP.TXT
CAM POS: -1234.939 5.568 -3369.192 CAM PYR: -0.0220 1.192 -0 Missions |
Portal Lab
| Demo Map Name: MAPS/MISSIONS/UNIQUE/CAPAUDIABLE/TECH_PORTALENTRY.TXT
CAM POS: -2048.428 4.633 -165.558 CAM PYR: -0.204 -0.465 -0 Missions |
Power Transfer System (PTS)
| Demo Map Name: MAPS/MISSIONS/UNIQUE/CAPAUDIABLE/PTS_CONTROLBUNKER.TXT
CAM POS: 407.709 -155 334.001 CAM PYR: -0.026 0.452 0 Missions
|
President Marchand's Penthouse
| Demo Map Name: MAPS/MISSIONS/OUTDOOR_MISSIONS/OUTDOOR_FLASHBACK/IOM_ST_MARTIAL/IOM_ST_MARTIAL.TXT
CAM POS: -2635.474 117.150 -756.567 CAM PYR: -0.100 -1.163 -0 Missions |
Rikti Homeworld Portal
| Demo Map Name: MAPS/MISSIONS/UNIQUE/RIKTI_WAR_ZONE/PORTAL_CAVERN_02/PORTAL_CAVERN_02.TXT
CAM POS: -85.598 5.5 -969.680 CAM PYR: -0.294 -0.201 -0 Missions Notes
|
Rikti Peace Conference
| Demo Map Name: MAPS/MISSIONS/UNIQUE/RIKTI_WAR_ZONE/VANGUARD_BASE_INTERIOR/VANGUARD_BASE_INTERIOR.TXT
CAM POS: 1680.560 -1342.042 -2105.100 CAM PYR: 0.008 2.132 -0 Missions |
S.E.R.A.P.H. Facility
| Demo Map Name: MAPS/MISSIONS/OUTDOOR_MISSIONS/V_OUTDOOR_STEELCANYON/SERAPH_LAB/V_OUTDOOR_STEELCANYON_SERAPH_LAB.TXT
CAM POS: -3967.357 5.955 -4693.513 CAM PYR: -0.100 -3.116 -0 Missions Notes
|
Salamanca
| Demo Map Name: MAPS/MISSIONS/OUTDOOR_MISSIONS/OUTDOOR_CROATOA/OUTDOOR_CROATOA_03/OUTDOOR_CROATOA_03.TXT
CAM POS: 325.988 5.287 1786.988 CAM PYR: -0.032 -0.573 -0 Missions |
Skyway City Rescue
| Demo Map Name: MAPS/MISSIONS/OUTDOOR_MISSIONS/V_OUTDOOR_SKYWAY/V_OUTDOOR_SKYWAY_BLOCKADE.TXT
CAM POS: 732.379 126.274 -774.386 CAM PYR: 0.264 0.324 0 Missions |
Snake Temple
| Demo Map Name: MAPS/MISSIONS/UNIQUE/SNAKECAVES/SNAKECAVES_45/SNAKECAVES_45_LAYOUT_01.TXT
CAM POS: -147.810 -74.816 884.017 CAM PYR: -0.278 -2.819 -0 Missions |
Speakeasy
| Demo Map Name: MAPS/MISSIONS/UNIQUE/V_CAP_AU_DIABLE/SPEAKEASY.TXT
CAM POS: 136.214 5.787 -105.202 CAM PYR: 0.024 0.928 -0 Missions
|
Steel Canyon Extraction
| Demo Map Name: MAPS/MISSIONS/OUTDOOR_MISSIONS/V_OUTDOOR_STEELCANYON/SERAPH_LAB/V_OUTDOOR_STEELCANYON_SERAPH_LAB.TXT
CAM POS: -4012.448 -62.980 578.342 CAM PYR: -0.014 -2.060 -0 Missions Notes
|
Stheno's Lair
| Demo Map Name: MAPS/MISSIONS/UNIQUE/V_GRANDVILLE/STHENOS_LAIR.TXT
CAM POS: 426.140 -265.129 1255.329 CAM PYR: -0.024 2.580 -0 Missions |
Superadine Lab
| Demo Map Name: MAPS/MISSIONS/UNIQUE/DOORMISSIONS/SKULLS_SUPERADINE_LAB.TXT
CAM POS: 348.274 5.5 286.756 CAM PYR: -0.124 -1.618 -0 Missions
|
Tiki Lounge
| Demo Map Name: MAPS/MISSIONS/UNIQUE/MERCYISLAND/CASINO_TIKI_01.TXT
CAM POS: -2.088 5.413 41.289 CAM PYR: 0.086 -2.280 -0 Missions |
Troll Lair
| Demo Map Name: MAPS/MISSIONS/UNIQUE/DOORMISSIONS/TROLLS_LAIR.TXT
CAM POS: 1062.220 -3.020 544.894 CAM PYR: -0.172 -1.554 0 Missions |
Tsoo Tattoo Parlor
| Demo Map Name: MAPS/MISSIONS/UNIQUE/ARTIFIED/TSOO_TATTOO_PARLOR.TXT
CAM POS: 170.905 5.757 -840.256 CAM PYR: 0.015 -1.586 -0 Missions
|
Tyrant's Lair
| Demo Map Name: MAPS/MISSIONS/UNIQUE/ARTIFIED/TYRANTS_LAIR.TXT
CAM POS: -306.446 -194.5 -960.019 CAM PYR: -0.204 1.557 0 Missions |
Winter Event Mission Map
| Demo Map Name: MAPS/MISSIONS/UNIQUE/WINTER_06/WINTER_EVENT06_CROATOA.TXT
CAM POS: -2379.615 -26.500 1271.916 CAM PYR: 0.088 -2.002 -0 Missions |
